Views
A View joins related data tables into one combined table. Each row of the View shows one combination of related records.
Views have three uses, in the order most projects meet them.
- Cascading Select questions: one question with several levels, such as Country, State and Town, built on a View that joins those tables. This is the most common reason to build a View. See Cascading Select.
- Inheritance Filters: separate questions where the answer to one filters the options of the next. See Inheritance Filters.
- Reading related data together: a View shows each record with its related records on one row, on the web and in the app. A large View can have a Snapshot, so it opens fast. An Interface does the same job as a page built around one record, and is often the better choice for reading. Either works.
A View respects data scoping like any table. A scoped user sees only their rows in it. See Groups and Data Scoping.
Dashboards do not read Views. They are built in Metabase on the analytics warehouse, which holds every table. See Dashboards.
The examples below use an Education project. The same method applies to any data model.
Start with three tables, Schools, Classes and Students, and some records.
| School Name (Text) | Location (Relation) |
|---|---|
| John's Primary | England |
| Mary's Secondary | Scotland |
| Class Name (Text) | School (Relation) |
|---|---|
| Class 1 | John's Primary |
| Class 2 | John's Primary |
| Class 3 | Mary's Secondary |
| Class 4 | Mary's Secondary |
| Student Name (Text) | Class (Relation) |
|---|---|
| Alexander | Class 1 |
| Anna | Class 1 |
| Michael | Class 2 |
| Maria | Class 2 |
| Daniel | Class 3 |
| Sofia | Class 3 |
| Luca | Class 4 |
| Elena | Class 4 |
There are two schools. Each school has two classes, and each class has two students.
A View joins them into one table. Each row shows one student with their class and school.
| School Name (Text) | Location (Relation) | Class Name (Text) | Student Name (Text) |
|---|---|---|---|
| John's Primary | England | Class 1 | Alexander |
| John's Primary | England | Class 1 | Anna |
| John's Primary | England | Class 2 | Michael |
| John's Primary | England | Class 2 | Maria |
| Mary's Secondary | Scotland | Class 3 | Daniel |
| Mary's Secondary | Scotland | Class 3 | Sofia |
| Mary's Secondary | Scotland | Class 4 | Luca |
| Mary's Secondary | Scotland | Class 4 | Elena |
Creating a View
Open the Views page from the main navigation on the left.
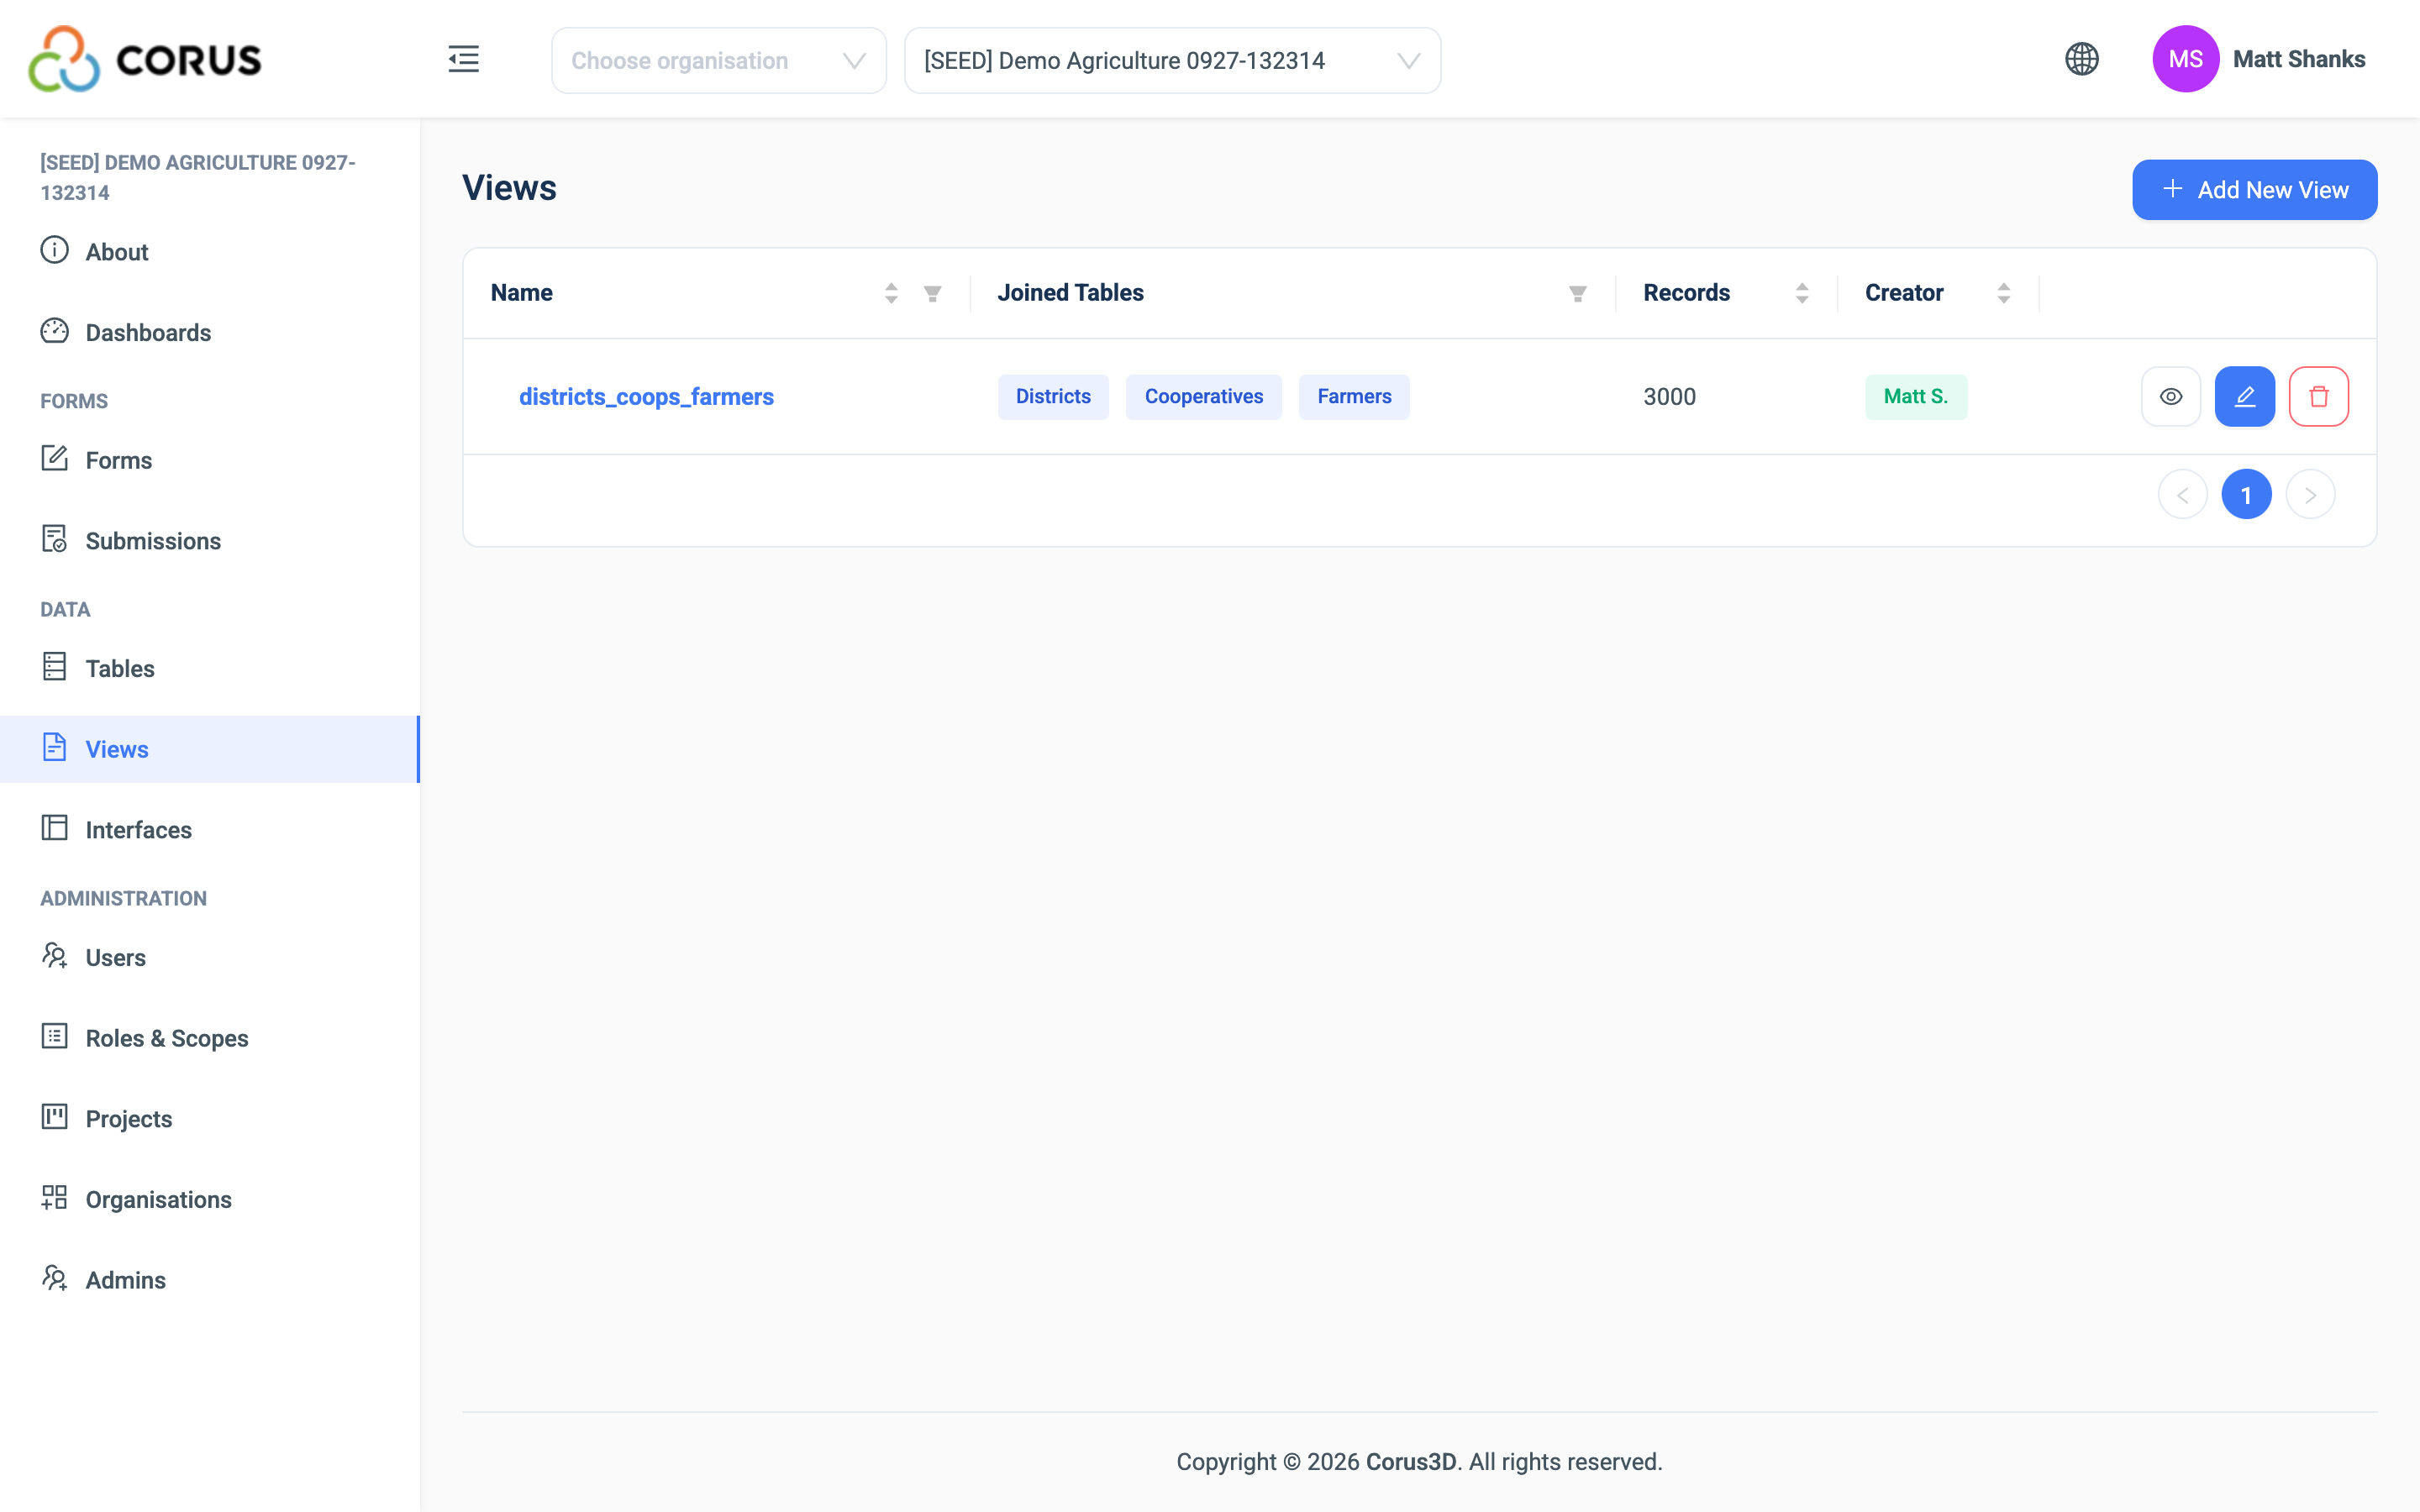
Click Add New View in the top right corner. A wizard with three steps opens: View Name, Select Join Tables and Configure Results.
Step 1: View Name
Give the View a name that says what it is for. You will pick it from lists later, so make it clear.
For the Education example, call it Schools Classes Students.
Leave Auto-Create View Snapshot off for now. See Snapshot for what it does.
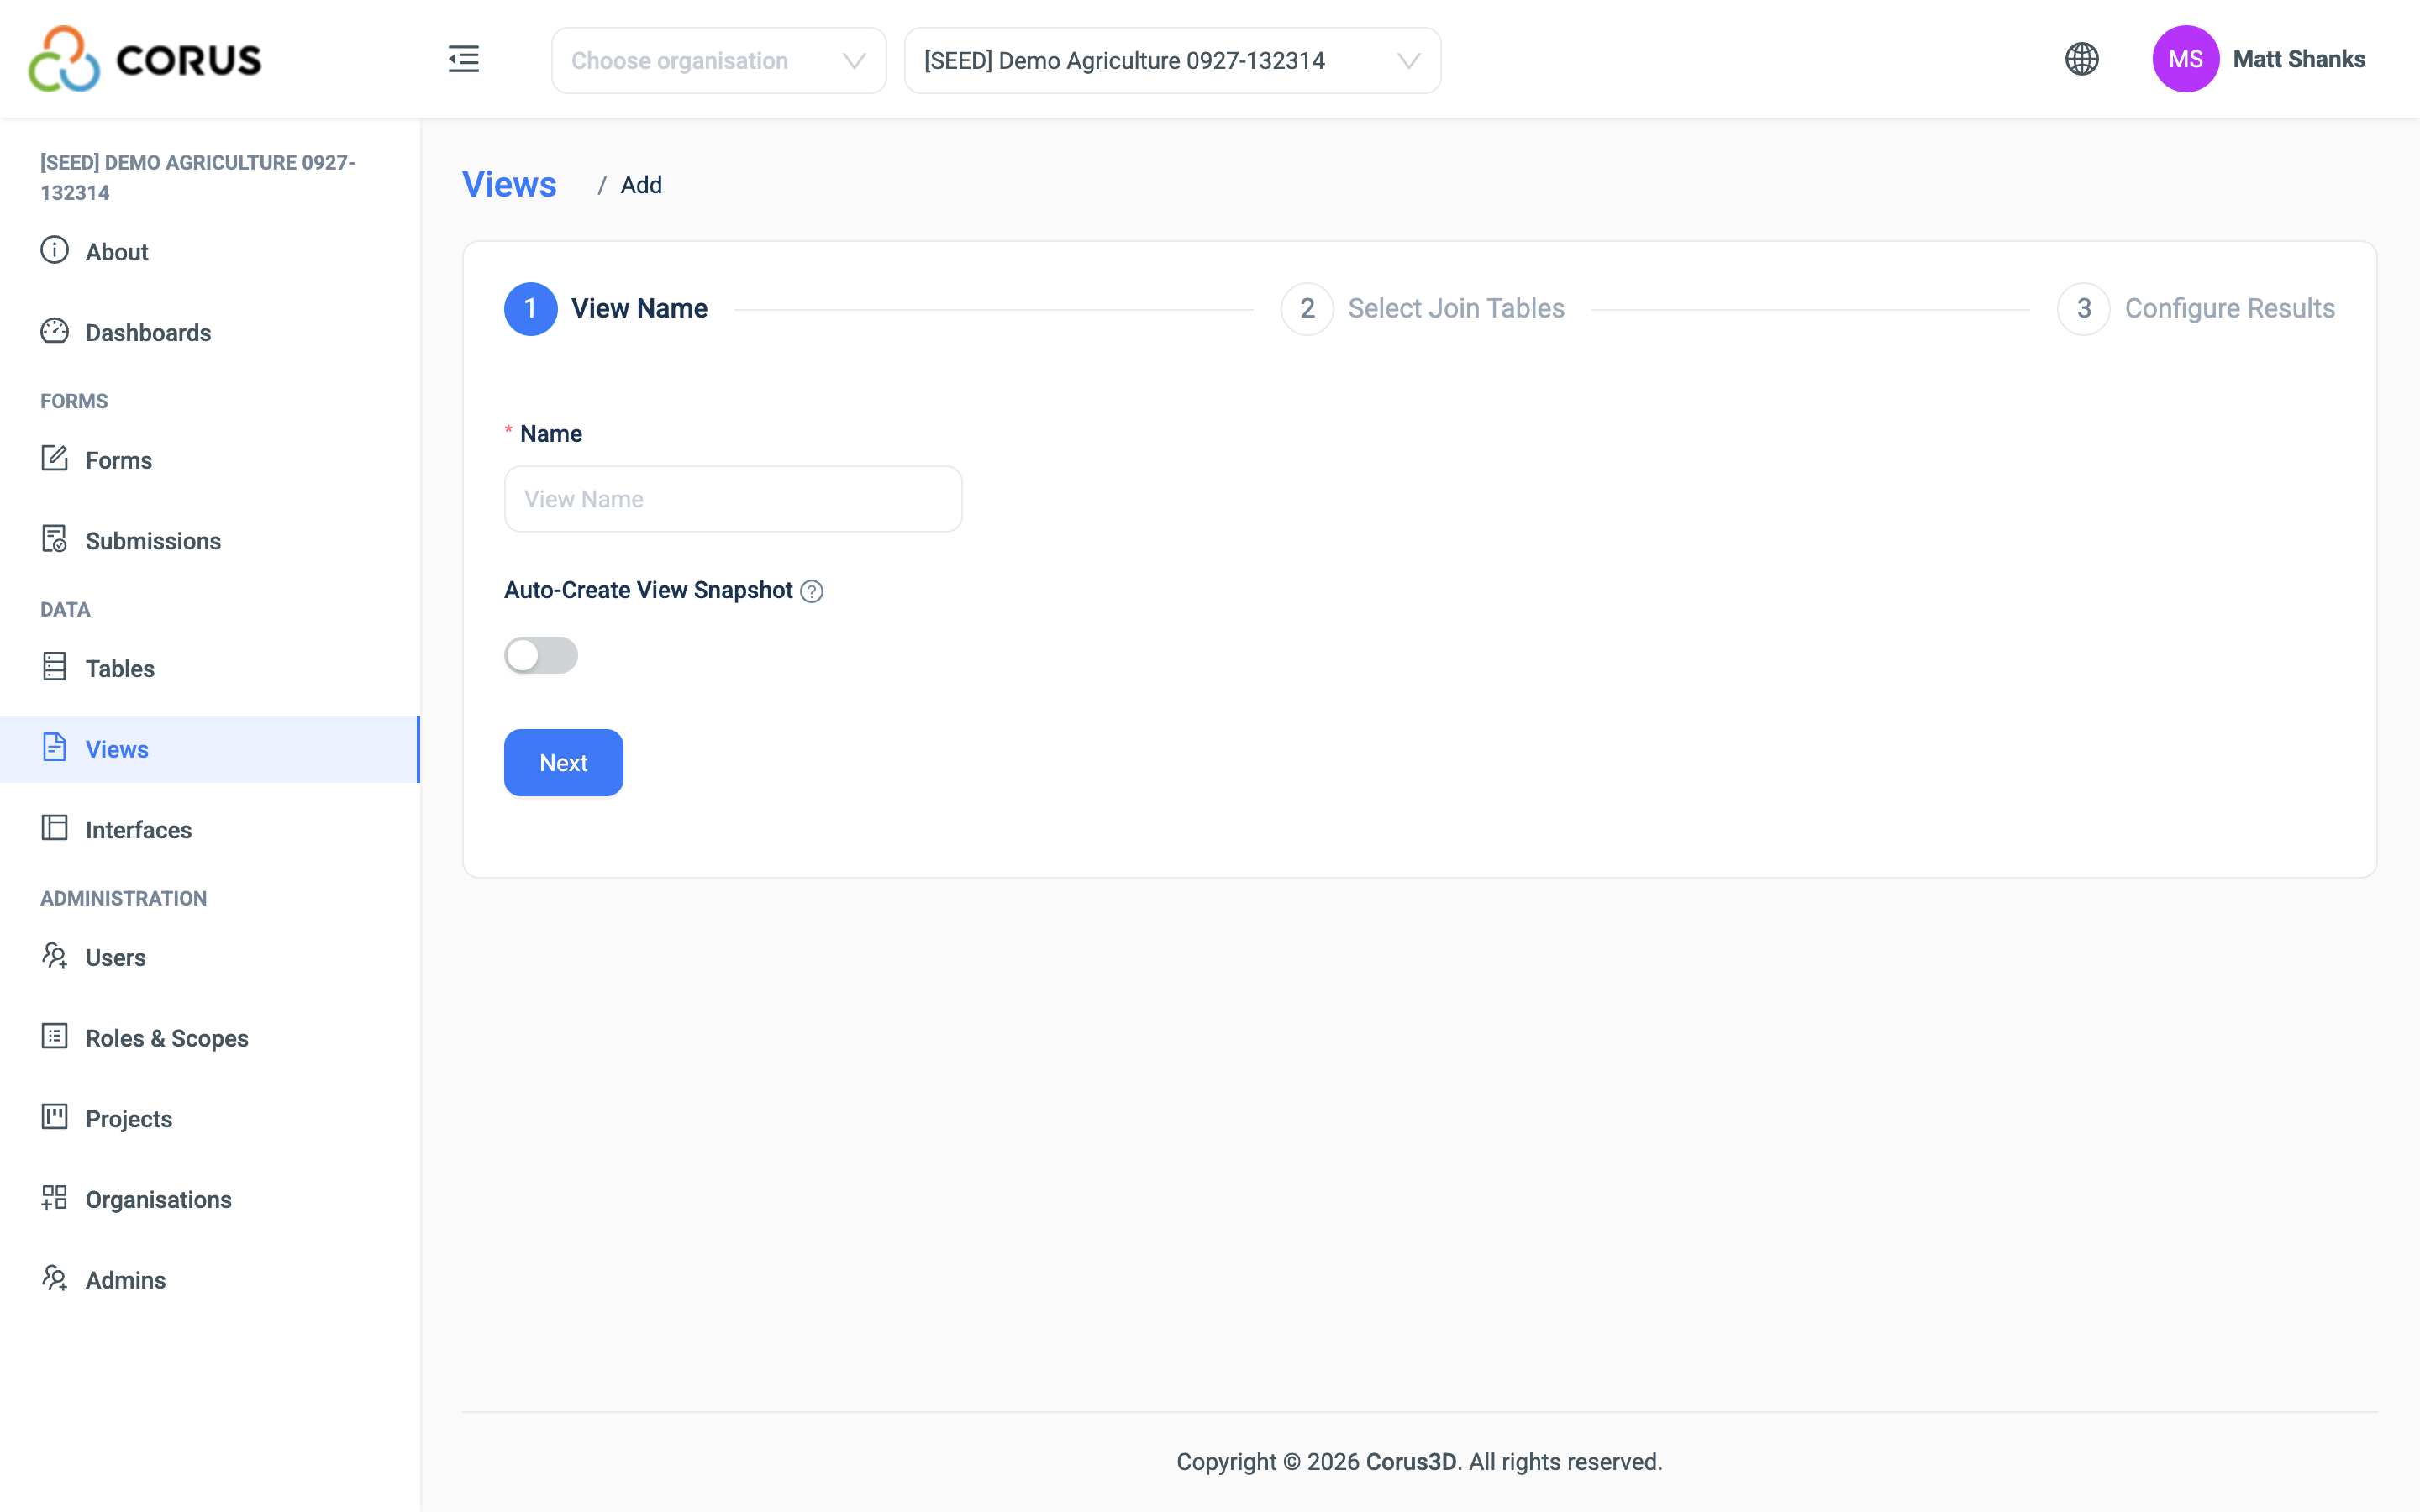
Click Next.
Step 2: Select Join Tables
Add the tables in the order you want to join them. Start with the broadest table, the one that contains the others. In our example a School has Classes, and a Class has Students, so start with Schools.
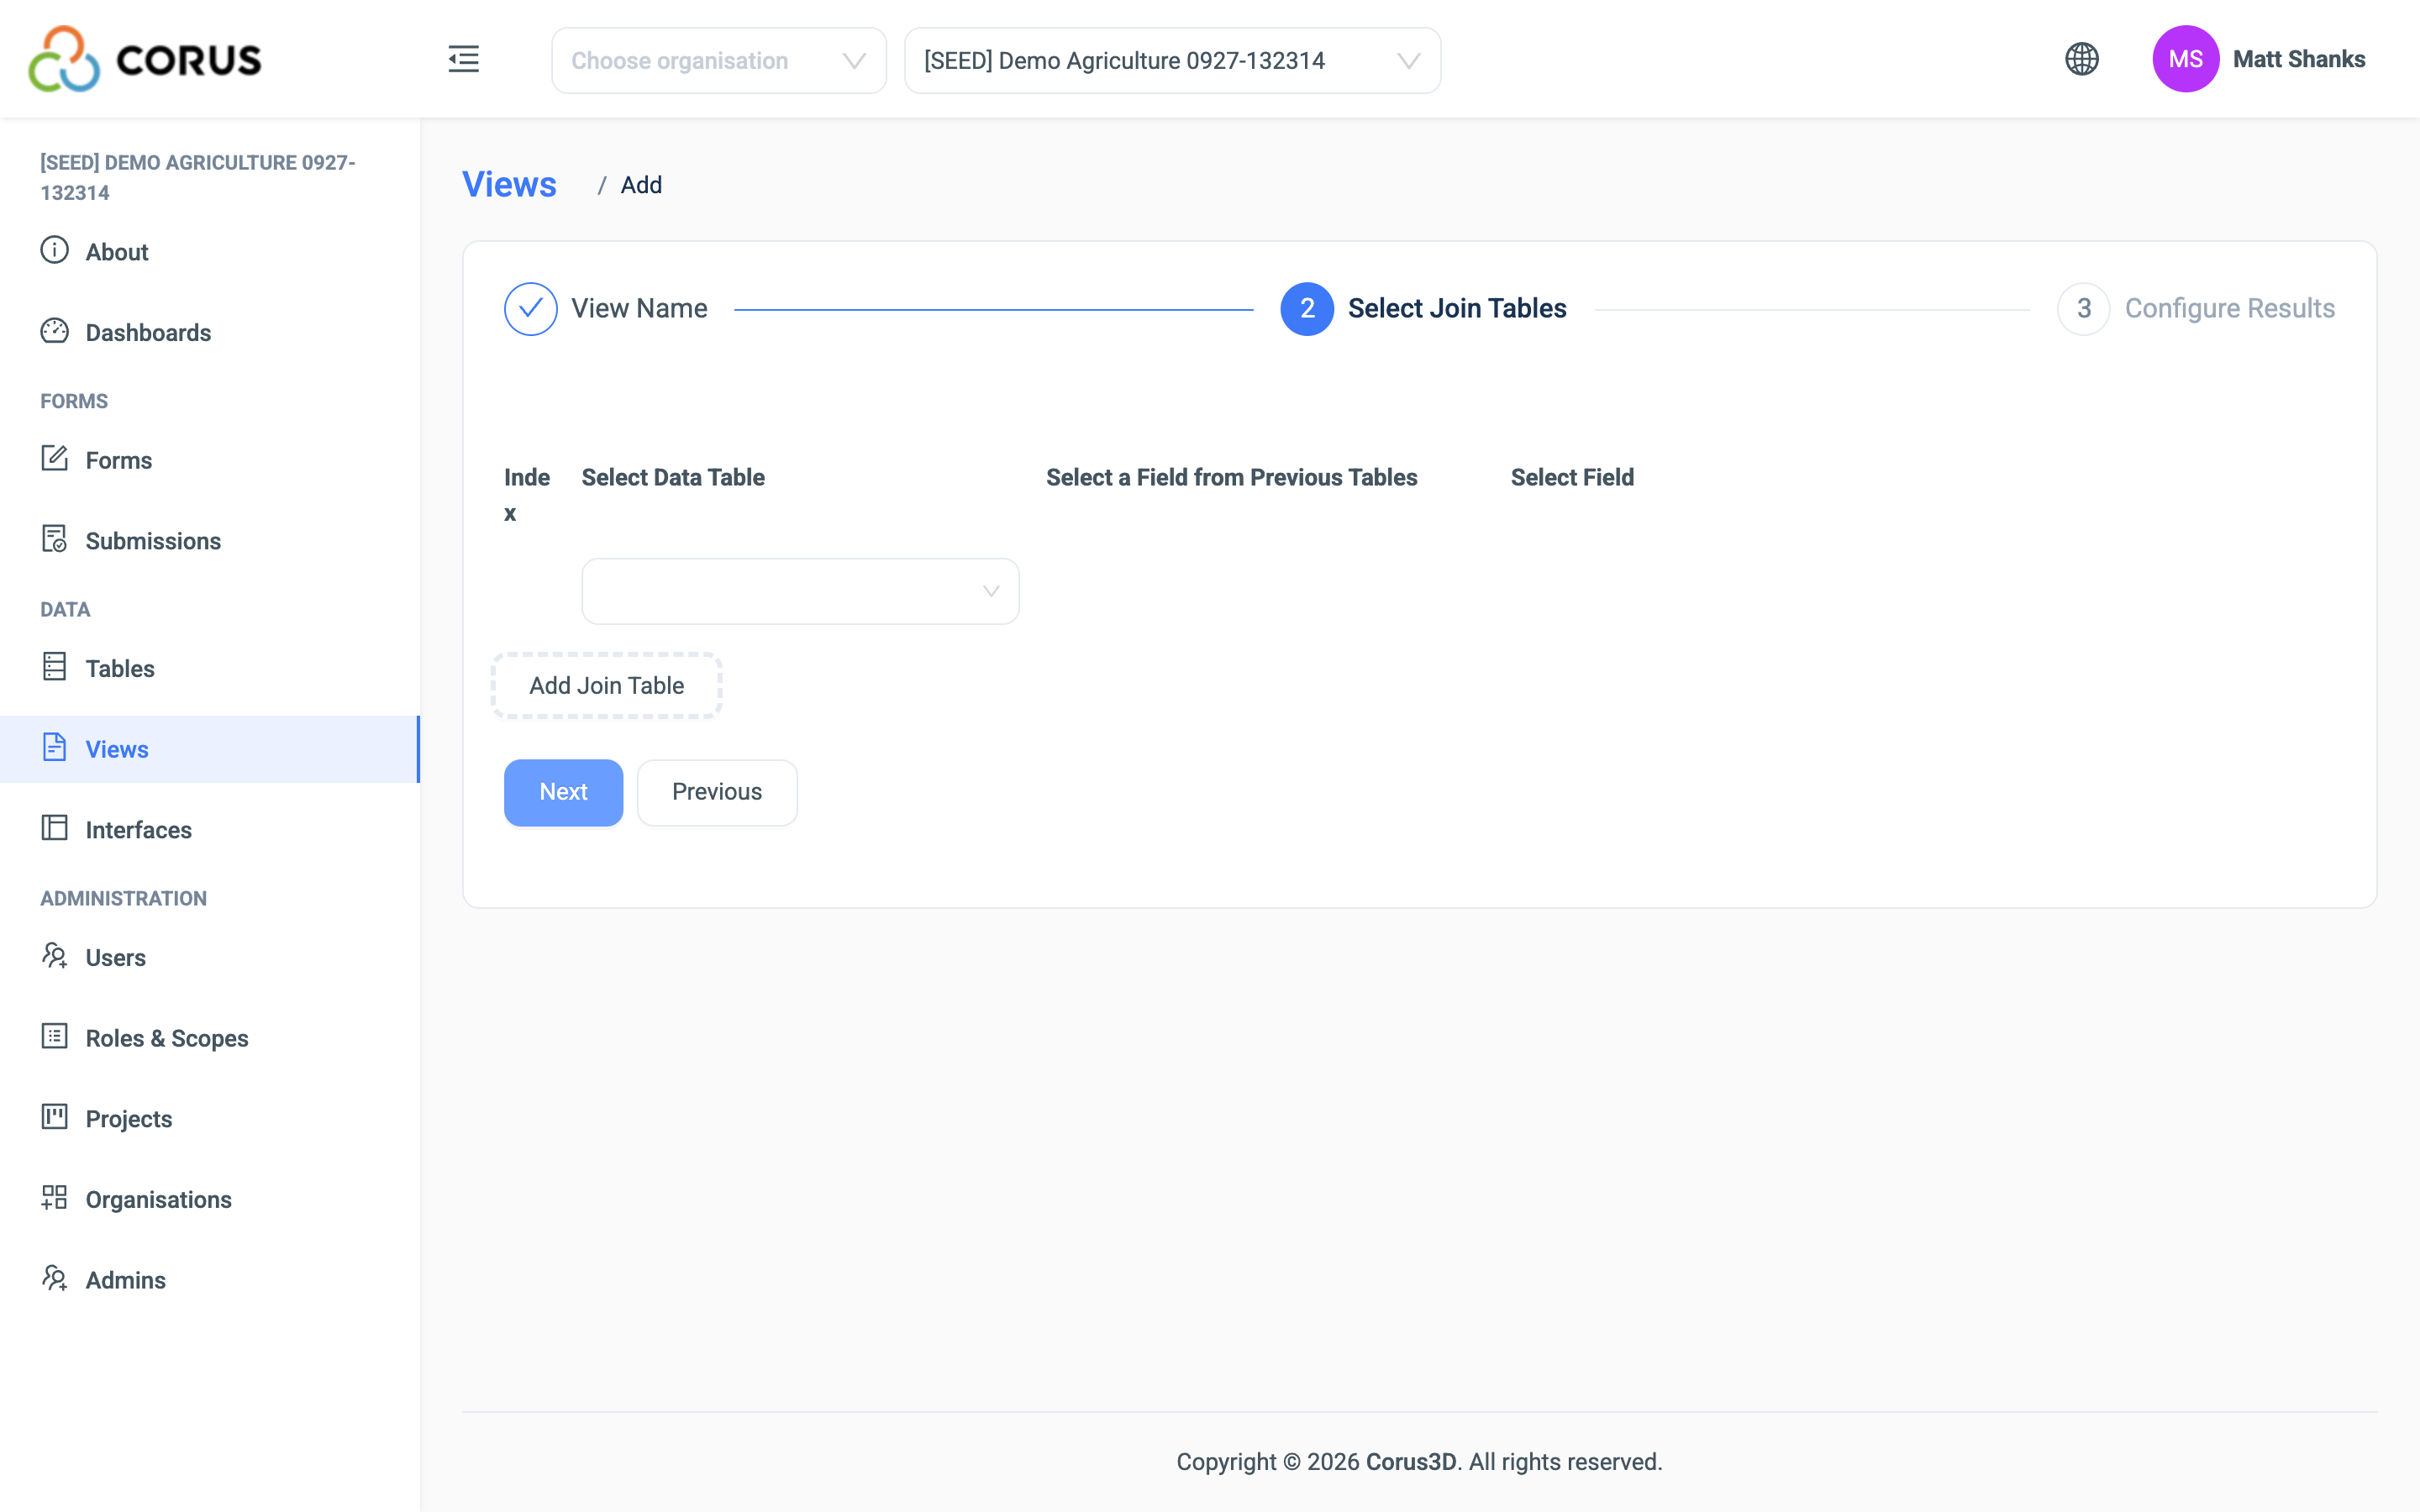
Click Add Join Table and select the next table down, Classes.
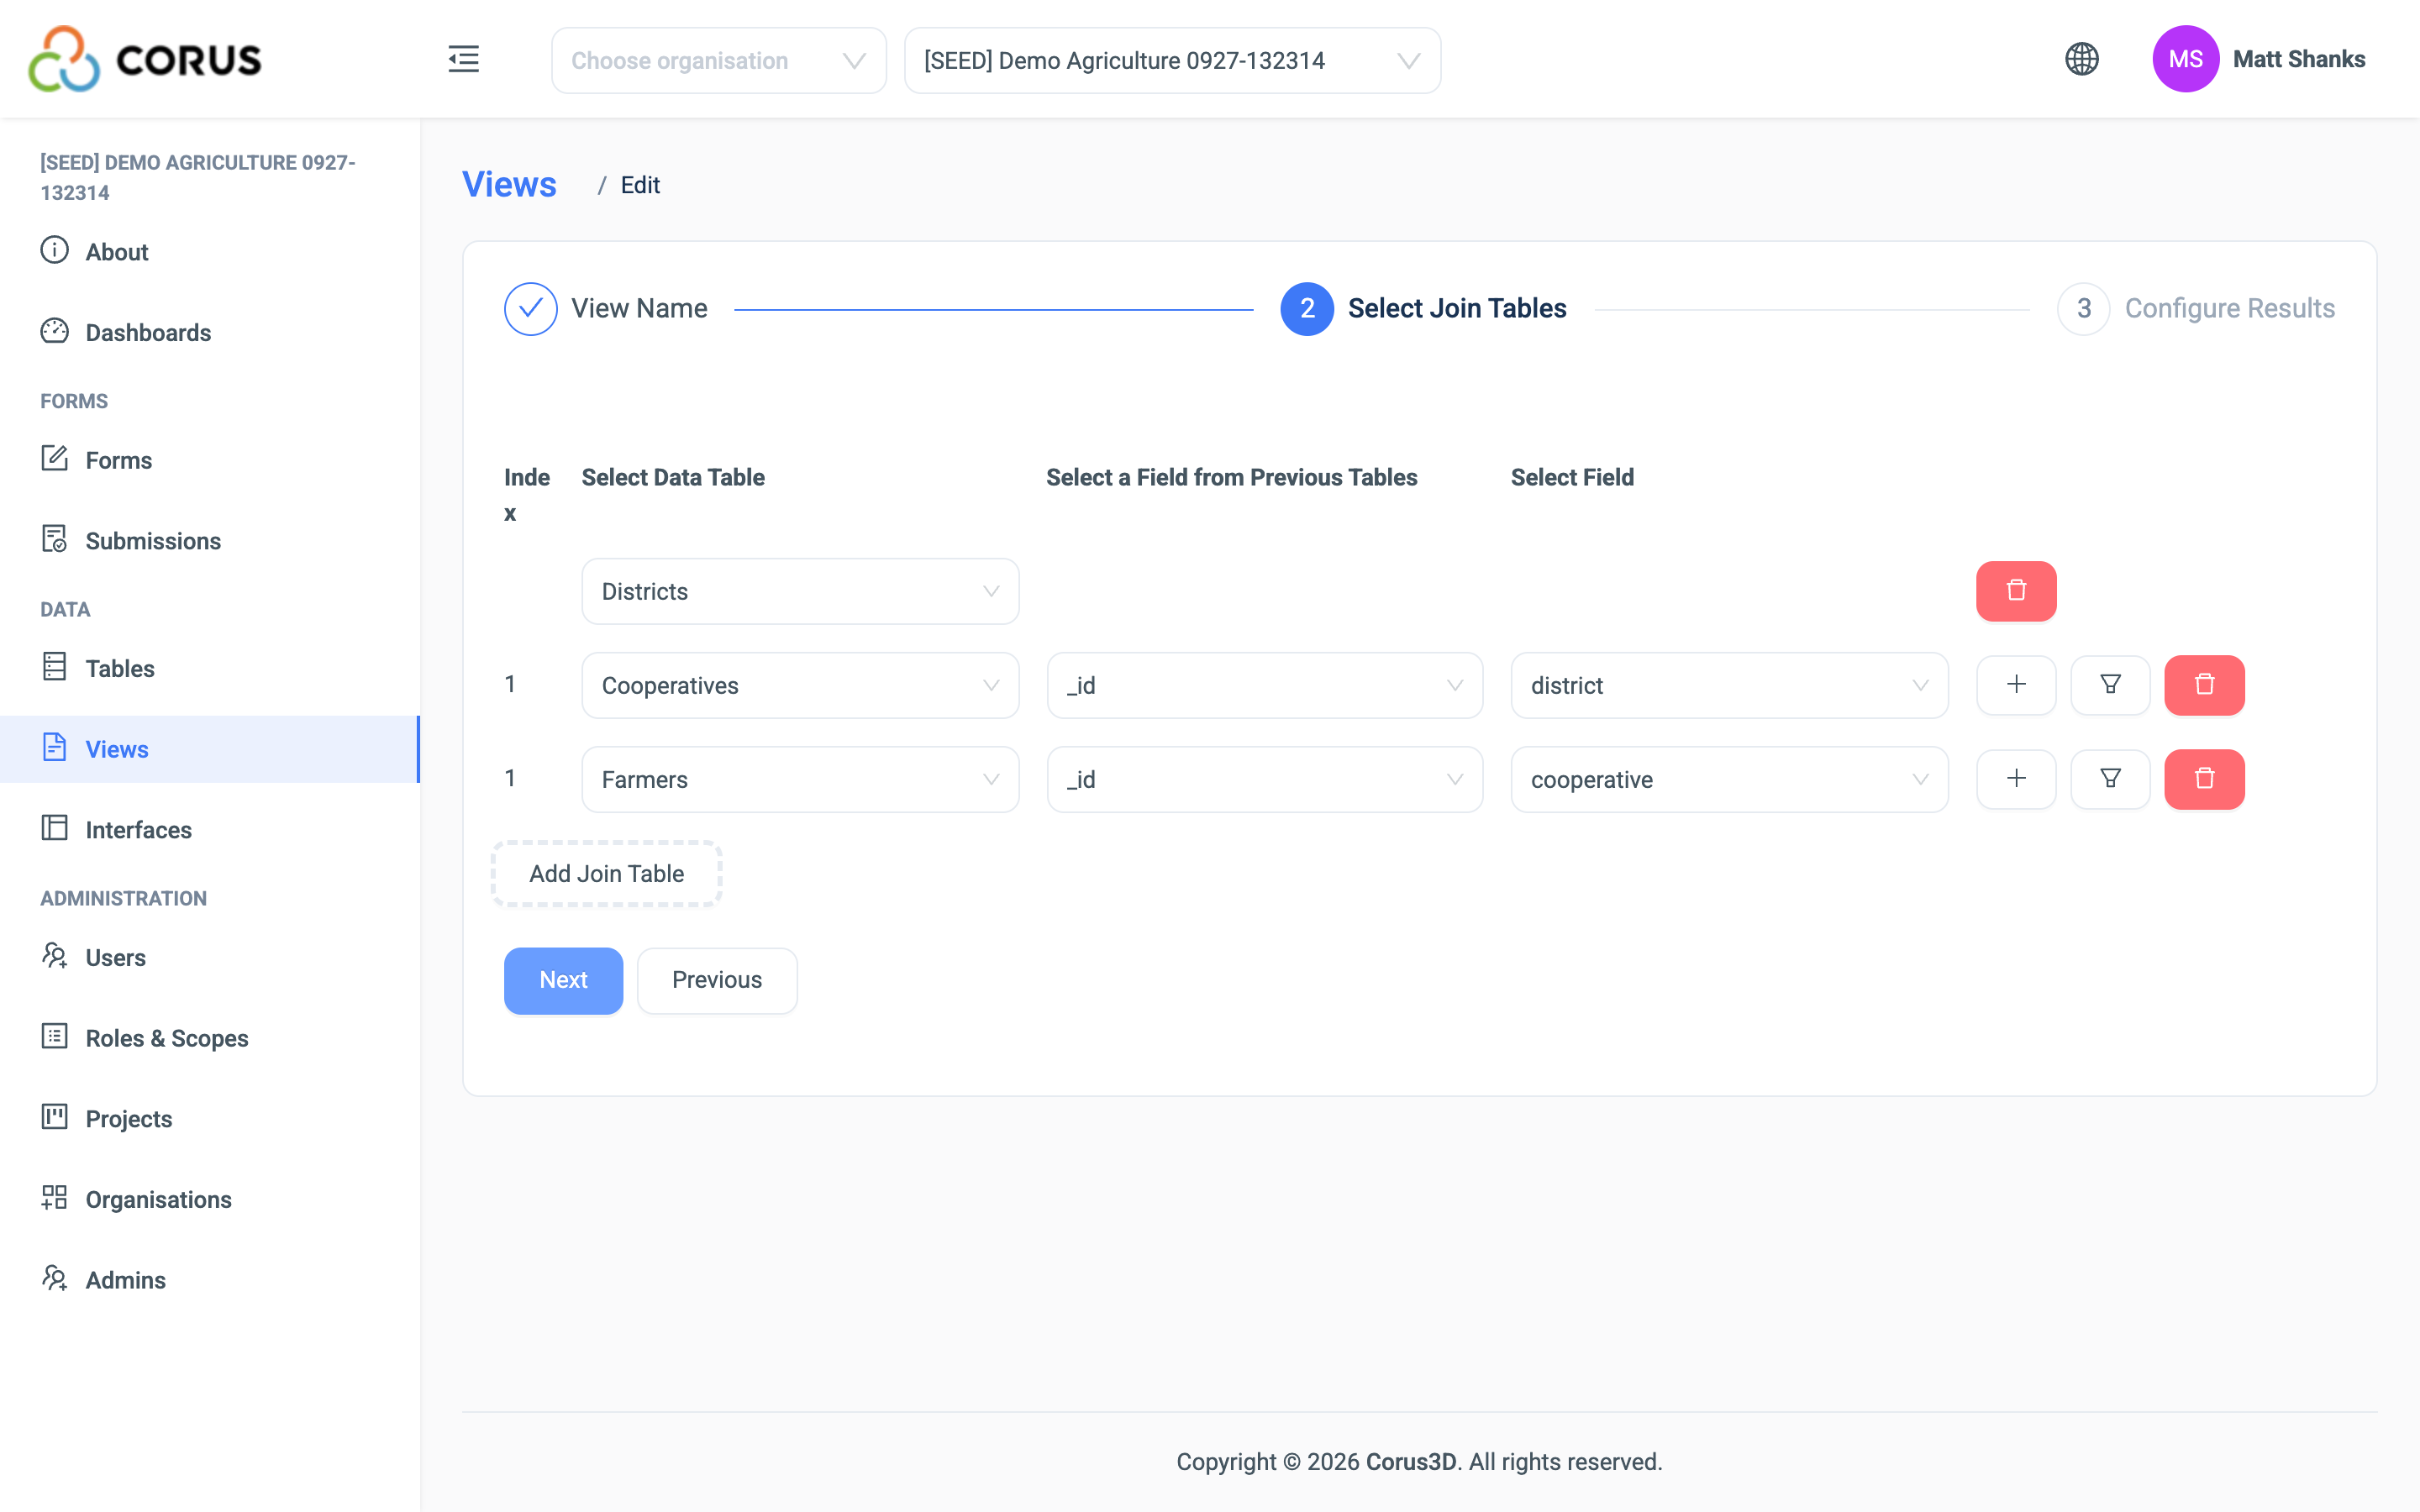
Each join has two settings that say how the tables connect.
- Select a Field from Previous Tables: the field on an earlier table to match.
- Select Field: the field on this table that must equal it.
Note
Every table has a system id field with a unique value for each record. You do not see it in most places, but you can use it in a join.
A Relation field stores the id of a record in another table.
For a simple hierarchy like this example, pick the id of the previous table and the Relation field of the current table.
The Classes table has two fields, Class Name (Text) and School (Relation). The School relation links a class to its school.
Repeat for Students. Match the id of Classes to the Class relation on Students. The screenshots above show the same shape on the Demo Agriculture project: Districts, then Cooperatives, then Farmers.
Every join is a left join. A record from an earlier table stays in the View even when the joined table has no match for it. The joined columns are then blank for that row.
Joins with more than one condition
Sometimes one field is not enough to match the right rows. For example, a Registration table links a Member and a Cycle. To join it to both, the join needs two conditions.
Click the + button on the join's row to add a condition. Each extra condition has an AND or OR switch. 3D applies the conditions in order, with no grouping, and AND has no priority over OR. A AND B OR C means (A AND B) OR C, and A OR B AND C means (A OR B) AND C.
Join where
The funnel button on a join's row opens Join where. Here you add conditions on the joined table's own fields. 3D applies them before the join.
A row of the joined table that fails a Join where condition does not join. The row from the earlier table stays in the View, with blank joined columns.
Use Join where when you want to keep every record from the earlier table, but only match some records from the joined table. For example, join every Member to their Registrations where status is Active.
Click Next.
Step 3: Configure Results
This step has two panels.
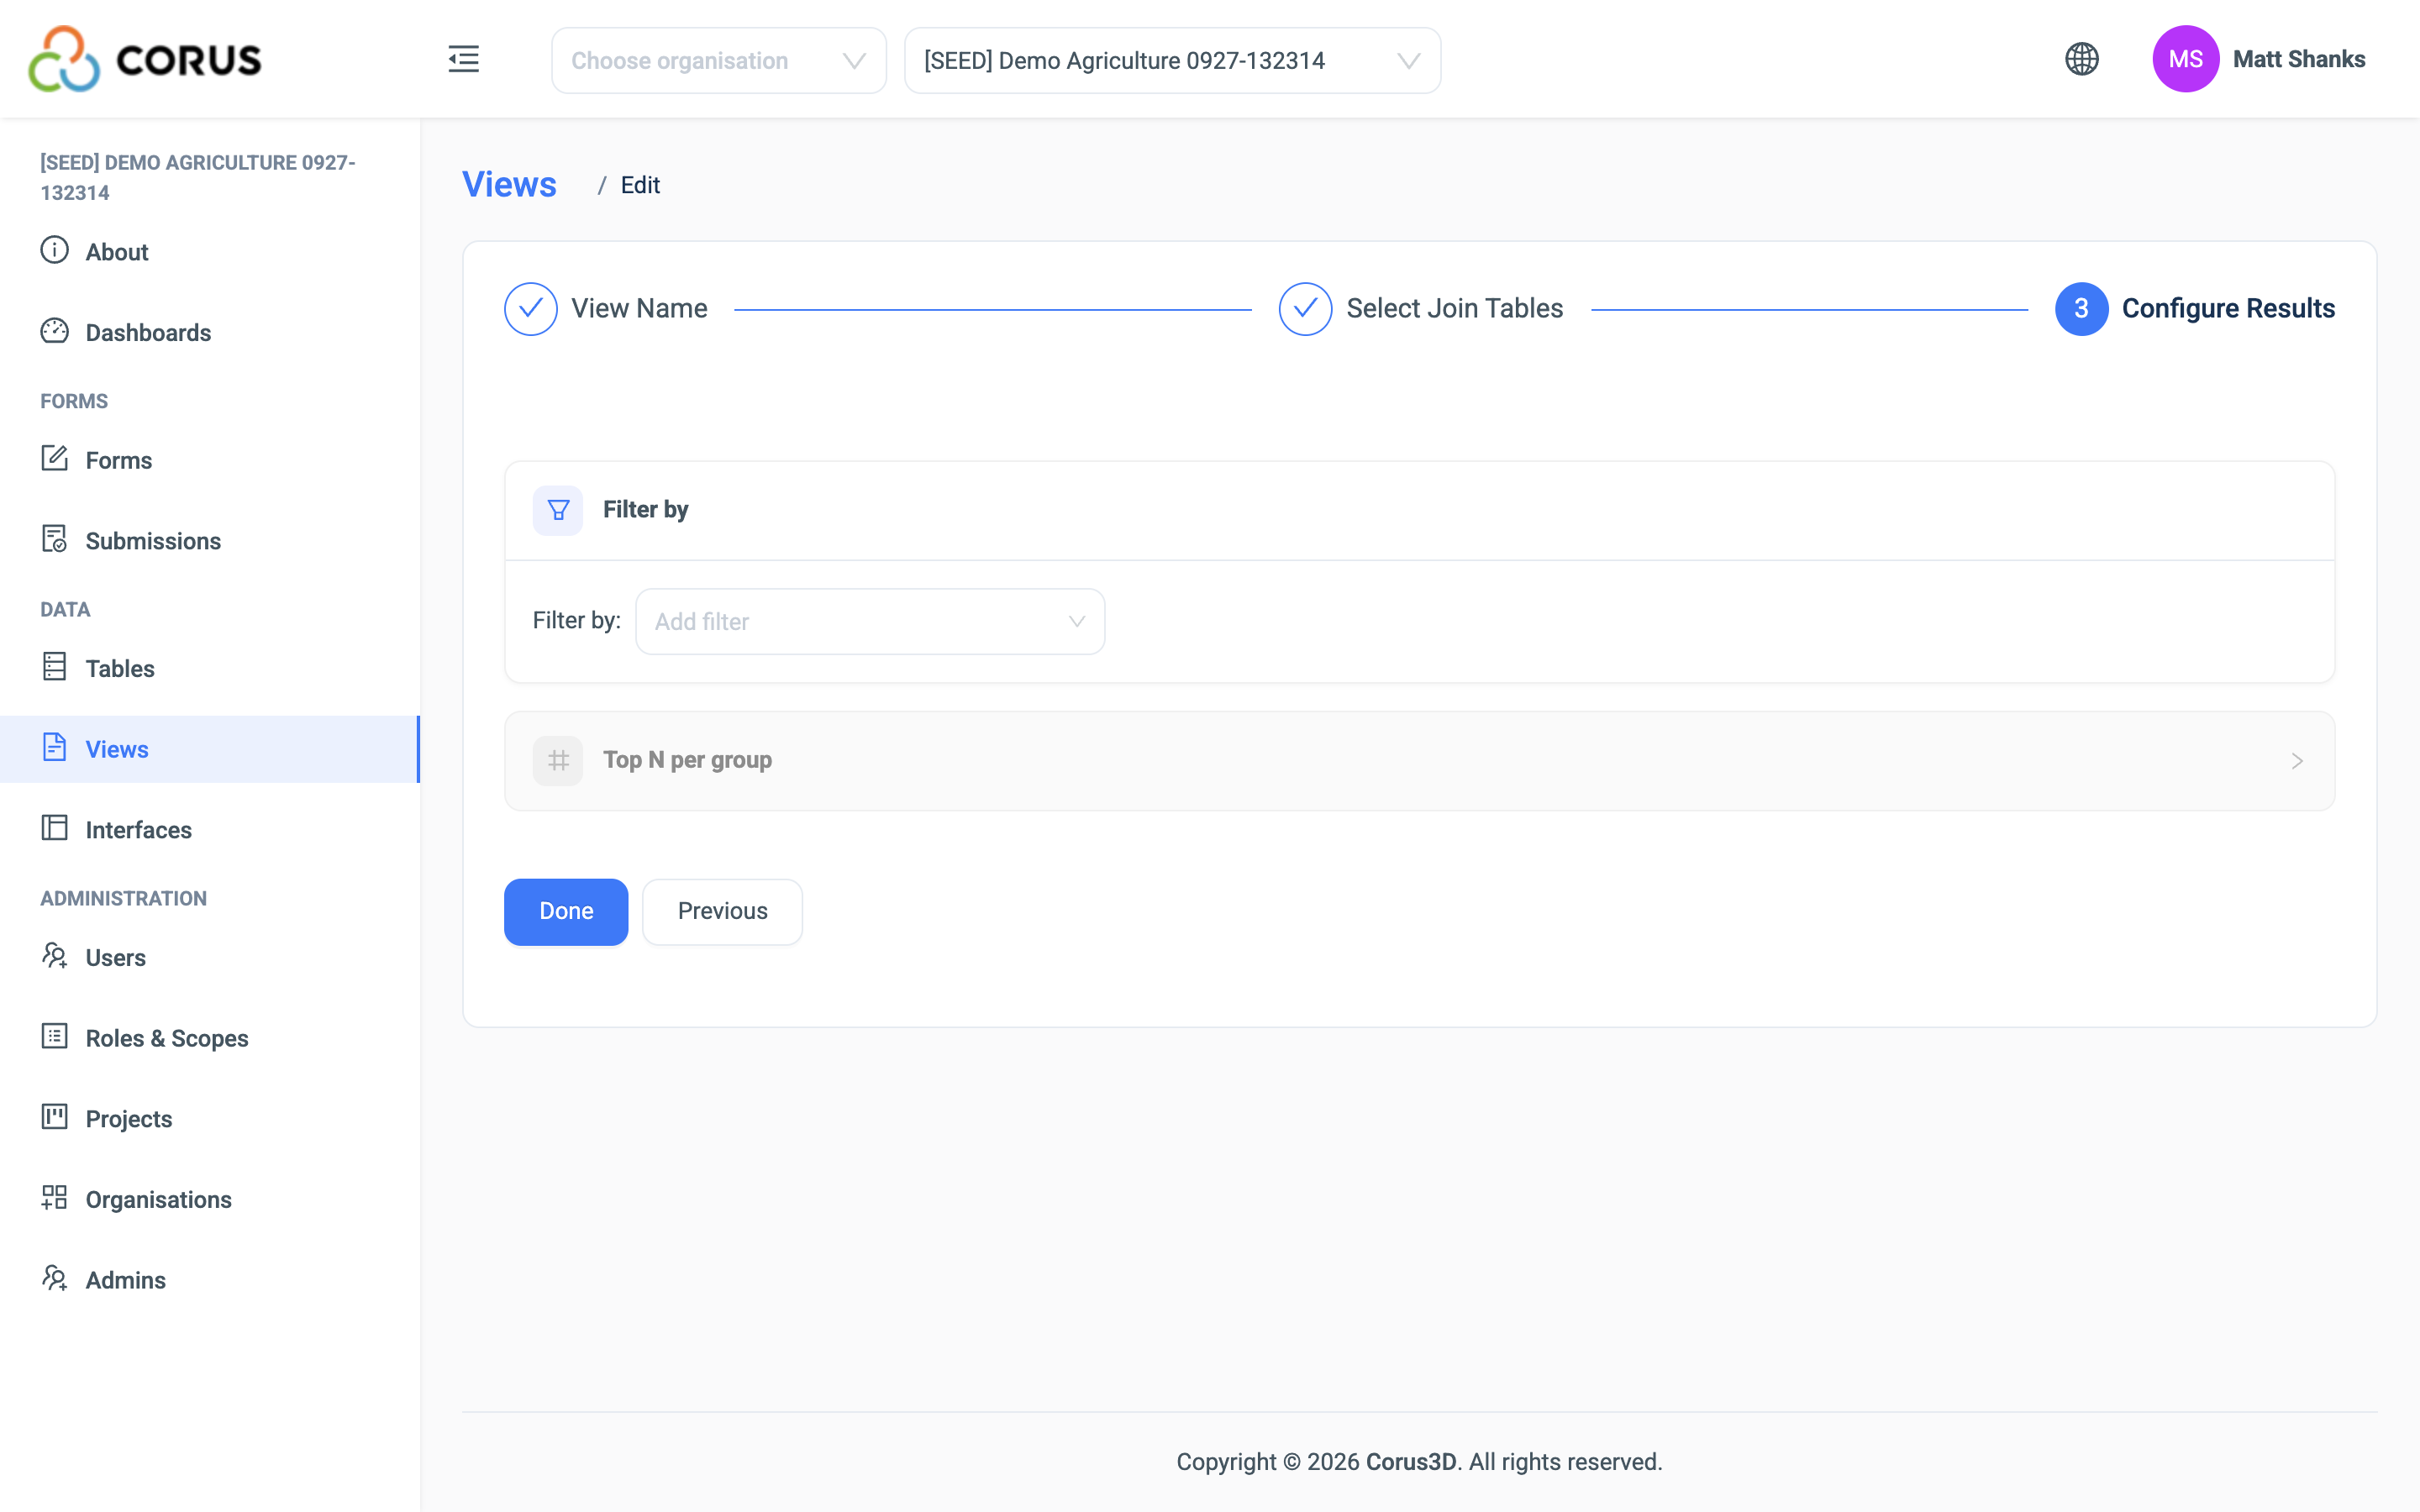
Filter by removes rows from the finished View. It can use fields from any joined table. A row that fails the filter is not in the View at all.
Note
Join where and Filter by look similar but do different things. Join where decides which joined records match, and keeps the earlier record either way. Filter by removes whole rows from the result.
To keep every Member and show only their active Registrations, use Join where. To keep only the Members that have an active Registration, use Filter by.
Top N per group keeps a set number of rows for each group and drops the rest. Set the count, the field to group by, and the field and direction to sort by. For example, keep the latest Visit for each Farm: count 1, group by Farm, sort by Visit Date descending.
Warning
Top N per group counts the rows of the View, not records. When a table joined after the one you sort by matches several records, each match is a row, and the count keeps rows. Sort by a field on the last joined table, or use Join where to limit the matches.
Click Done. The View is ready.
Conditions and operators
Join where and Filter by use the same condition editor. The controls depend on the field type.
| Field type | Condition |
|---|---|
| Text, Long Text | Contains the text. Case does not matter. |
| Integer, Decimal, Range, Percent | A value with an operator: =, !=, <, >, <=, >=. Or a From and To range. |
| Date, DateTime | A date with the same operators. Or a From and To range. |
| Select One, Multi-Select | One or more of the options. |
| Toggle | On, off or both. |
| Relation | Contains the text, matched against the related record's display value. |
| Any type | Blank or Non-blank. |
Testing a View
Open the Views page and click the View's name. The View opens as a table with every combined row.
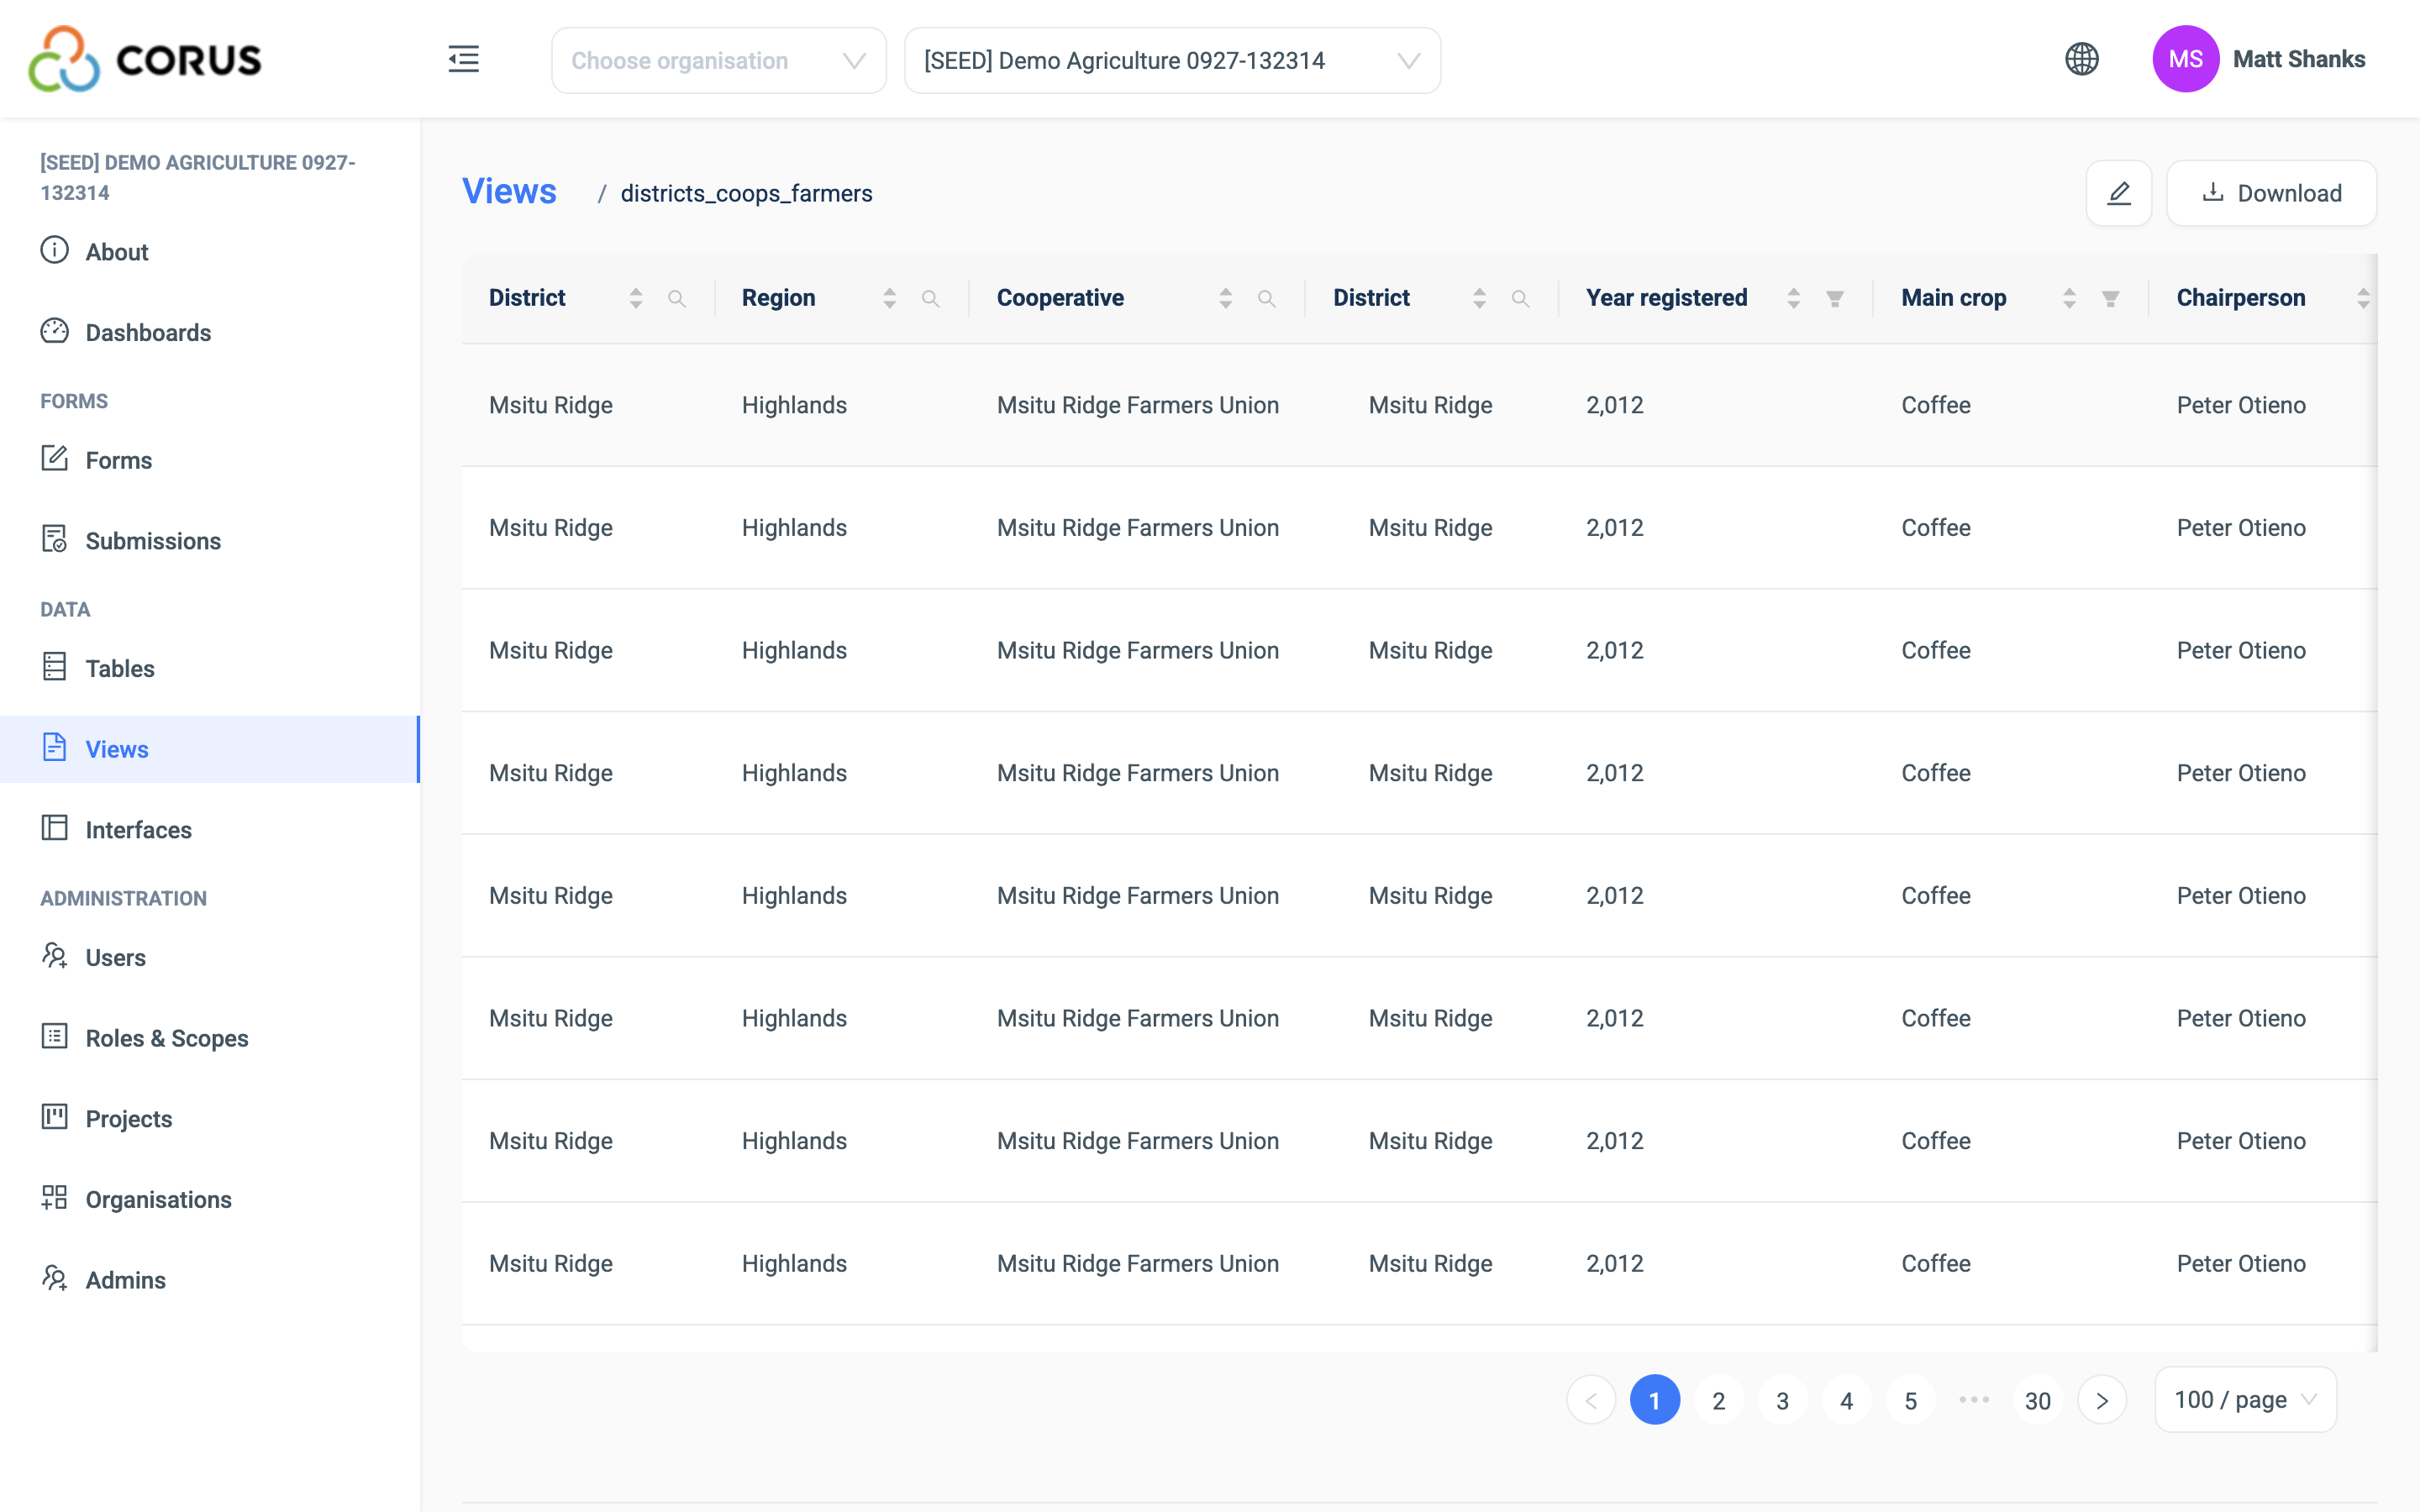
If the result is not what you expect, check the join fields. Unexpected duplicates or missing rows usually mean that the two join fields are the wrong way round.
Tip
You can also check the View from the Inheritance Filters setup. See the tip on that page.
Exporting a View
Open the View and click Download, then CSV or Excel. Download needs the View Data permission. The file holds the rows that match the current filters. The first table's fields keep their names. A joined table's fields carry the table's name in front, and a table joined twice carries a number. A Relation field gives two columns, the display value and the system id. A GeoLocation field gives the value, the latitude and the longitude.
Editing a View
Open the Views page from the main navigation on the left.
Click the blue edit button on the View's row. The wizard opens with the View's current settings. Change the name, the joins, the filters or the snapshot setting.
Warning
3D rebuilds the View as soon as you save. Forms that use it for Inheritance Filters, and the app, show the change at once.
Deleting a View
Open the Views page from the main navigation on the left.
Click the red delete button on the View's row. Confirm in the dialogue.
Warning
Deleting a View is permanent. Forms that use the View for Inheritance Filters stop filtering until you give them another View.
Snapshot
A Snapshot is a stored copy of the View's rows.
Without a Snapshot, 3D computes the joins each time someone opens the View, or each time a form or the app reads options through it. For most Views that is fast. For large tables with many joined records it can be slow.
With Auto-Create View Snapshot on, 3D keeps a stored copy and reads from that copy. The View loads much faster.
3D rebuilds the Snapshot every day at 00:05 UTC, and again each time you save the View. Between rebuilds the data can be up to 24 hours old. If you need live data, leave Snapshots off.
Enabling Snapshots
The Auto-Create View Snapshot switch is in Step 1 of the wizard, when you create or edit the View.
Tip
For a View over large tables that forms or the app read often, turn Snapshots on. It loads much faster, and the data is fresh enough for almost all uses.