Forms
Forms collect data. Your team completes them in the browser on the web, or in the 3D app on a phone or tablet.
When you create a form, you add a set of questions, also called inputs. Each question has a type. The right type improves the quality of the data you collect and makes analysis easier.
Each form is connected to a data table. The table is like a spreadsheet. Each question is a column, and each approved submission is a row, or record. Until a submission is approved, only its author sees it. See Submissions.
Example
| First Name | Surname | Phone Number | |
|---|---|---|---|
| John | Smith | 07935123123 | john.smith@3d.com |
| Jane | Smith | 07935321321 | jane.smith@3d.com |
A form that collects contact details, with two approved submissions. One record for John Smith and one for Jane Smith.
When you add a question to the form, 3D adds the matching column to the table.
Creating a form
Open the Forms page from the main navigation on the left. The page lists the forms in your project. If the project has no forms yet, the list is empty.
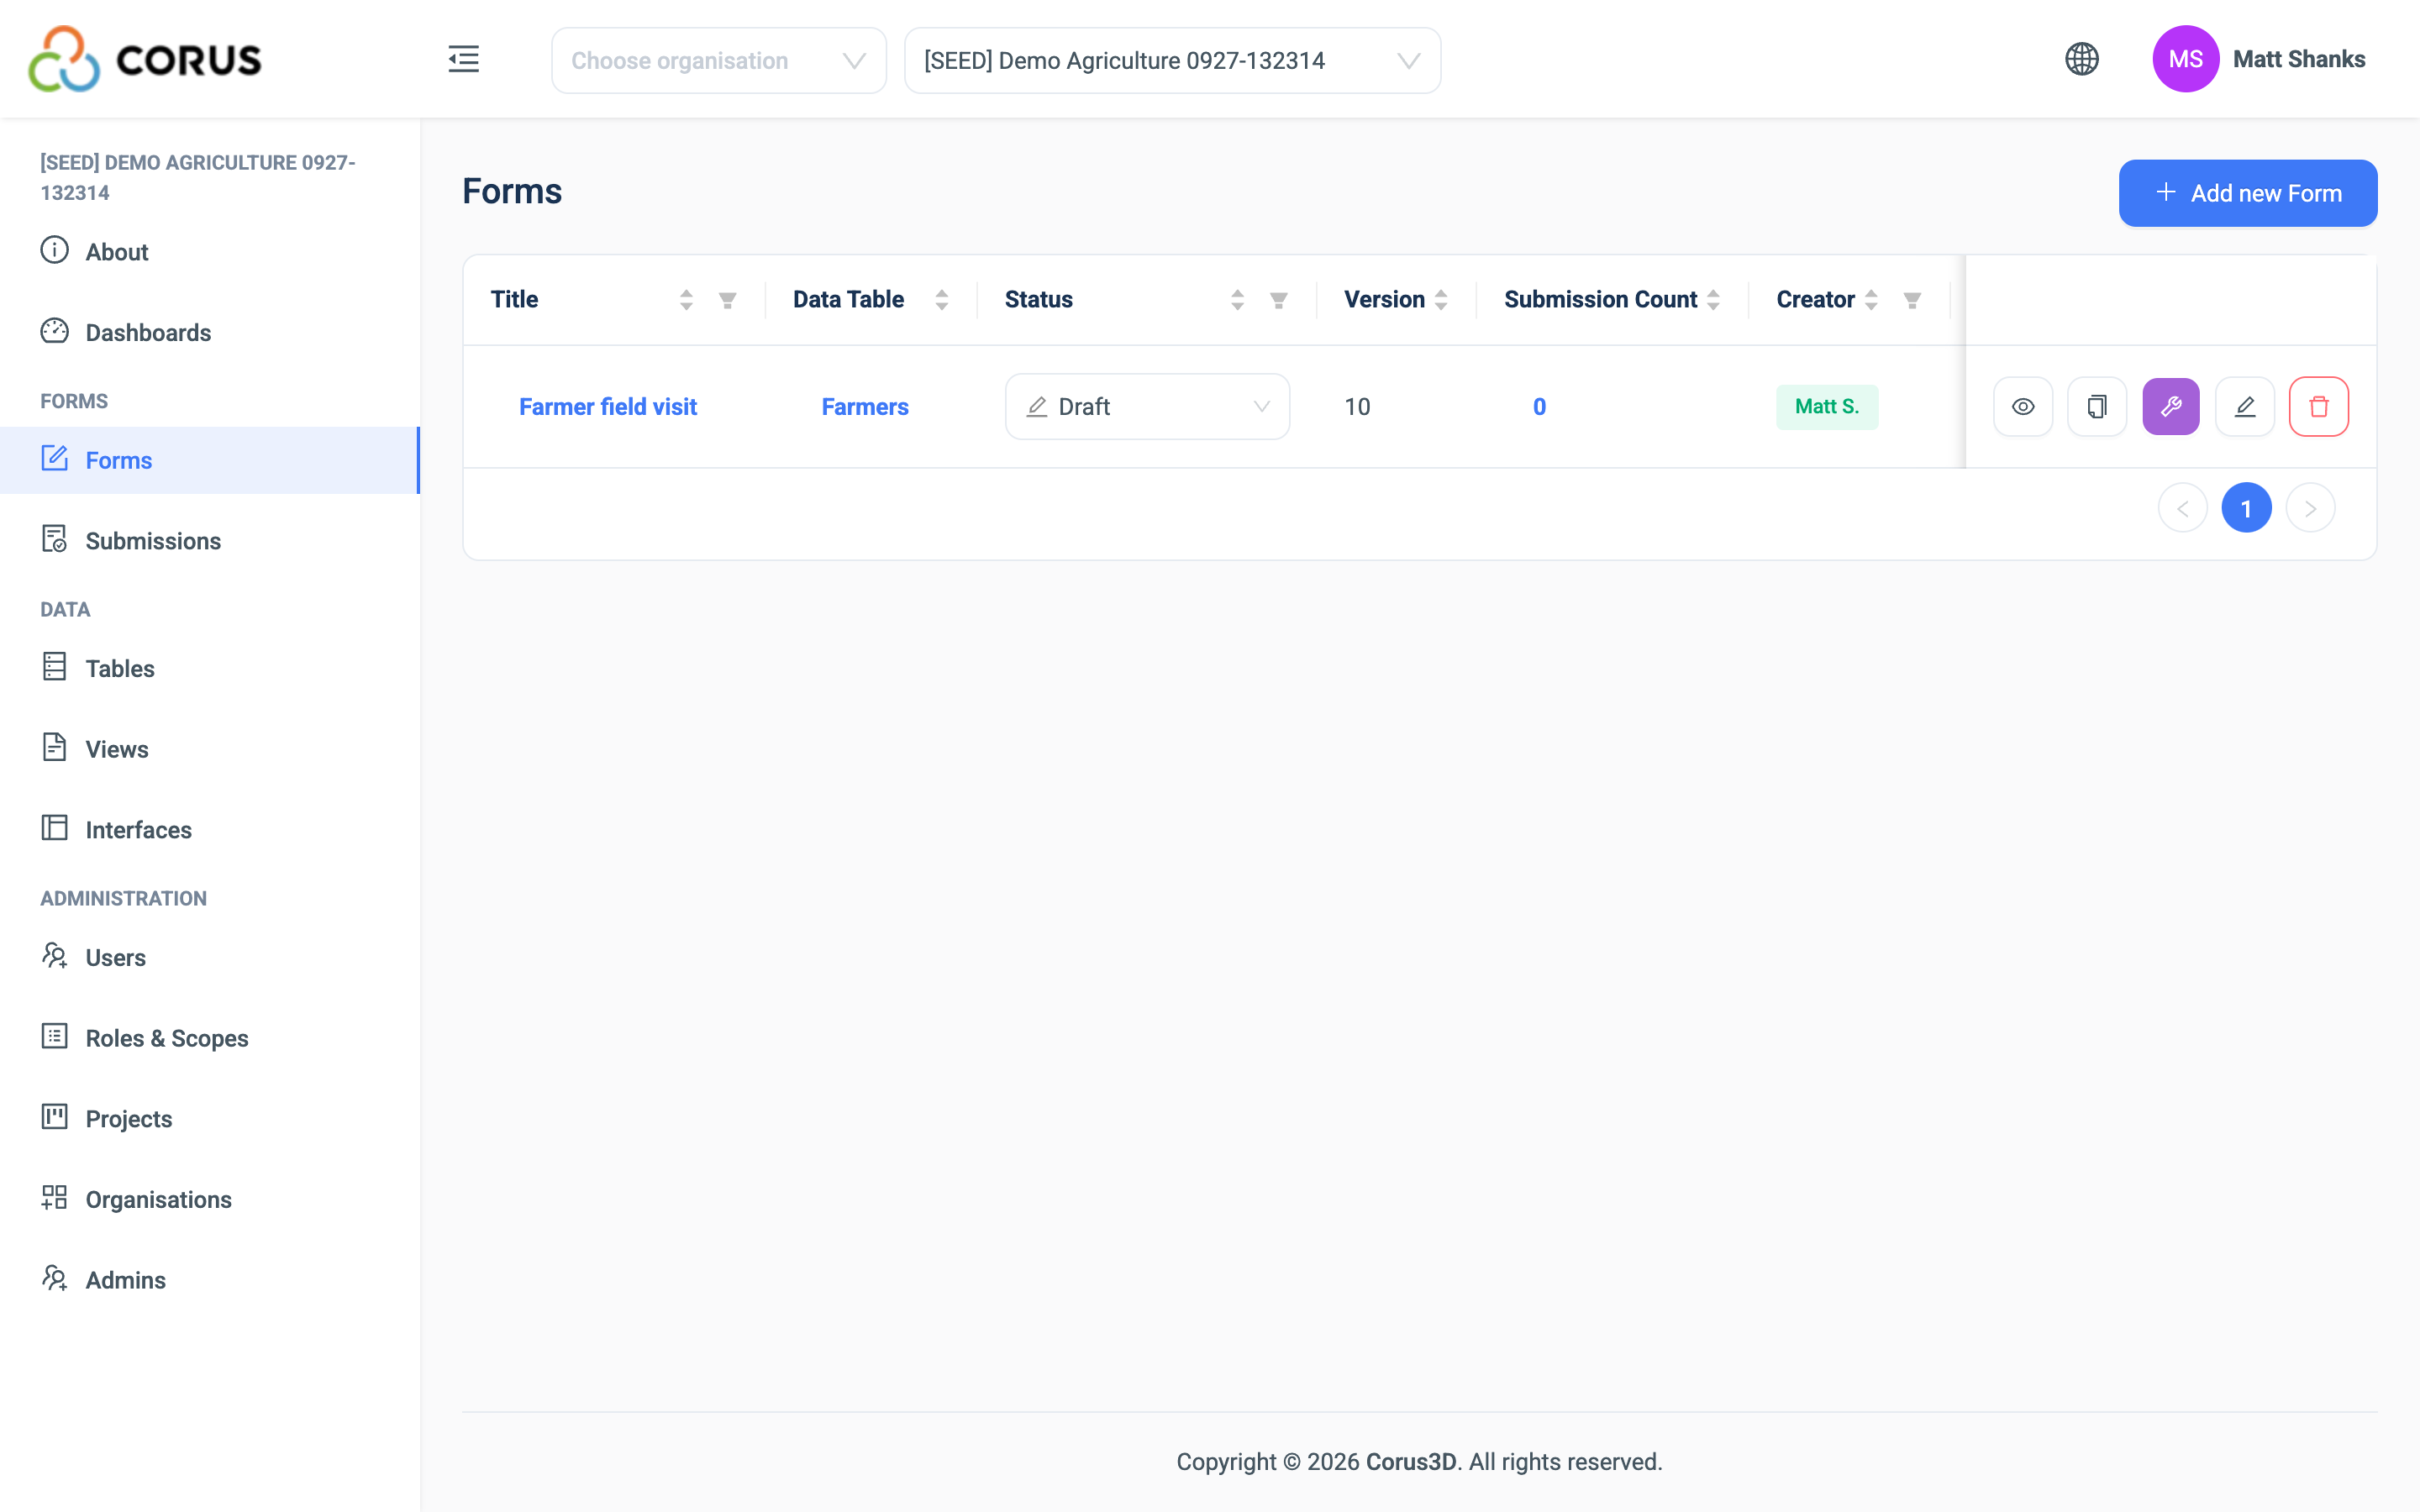
To create a form, click Add New Form in the top right corner. The Add new Form page opens.
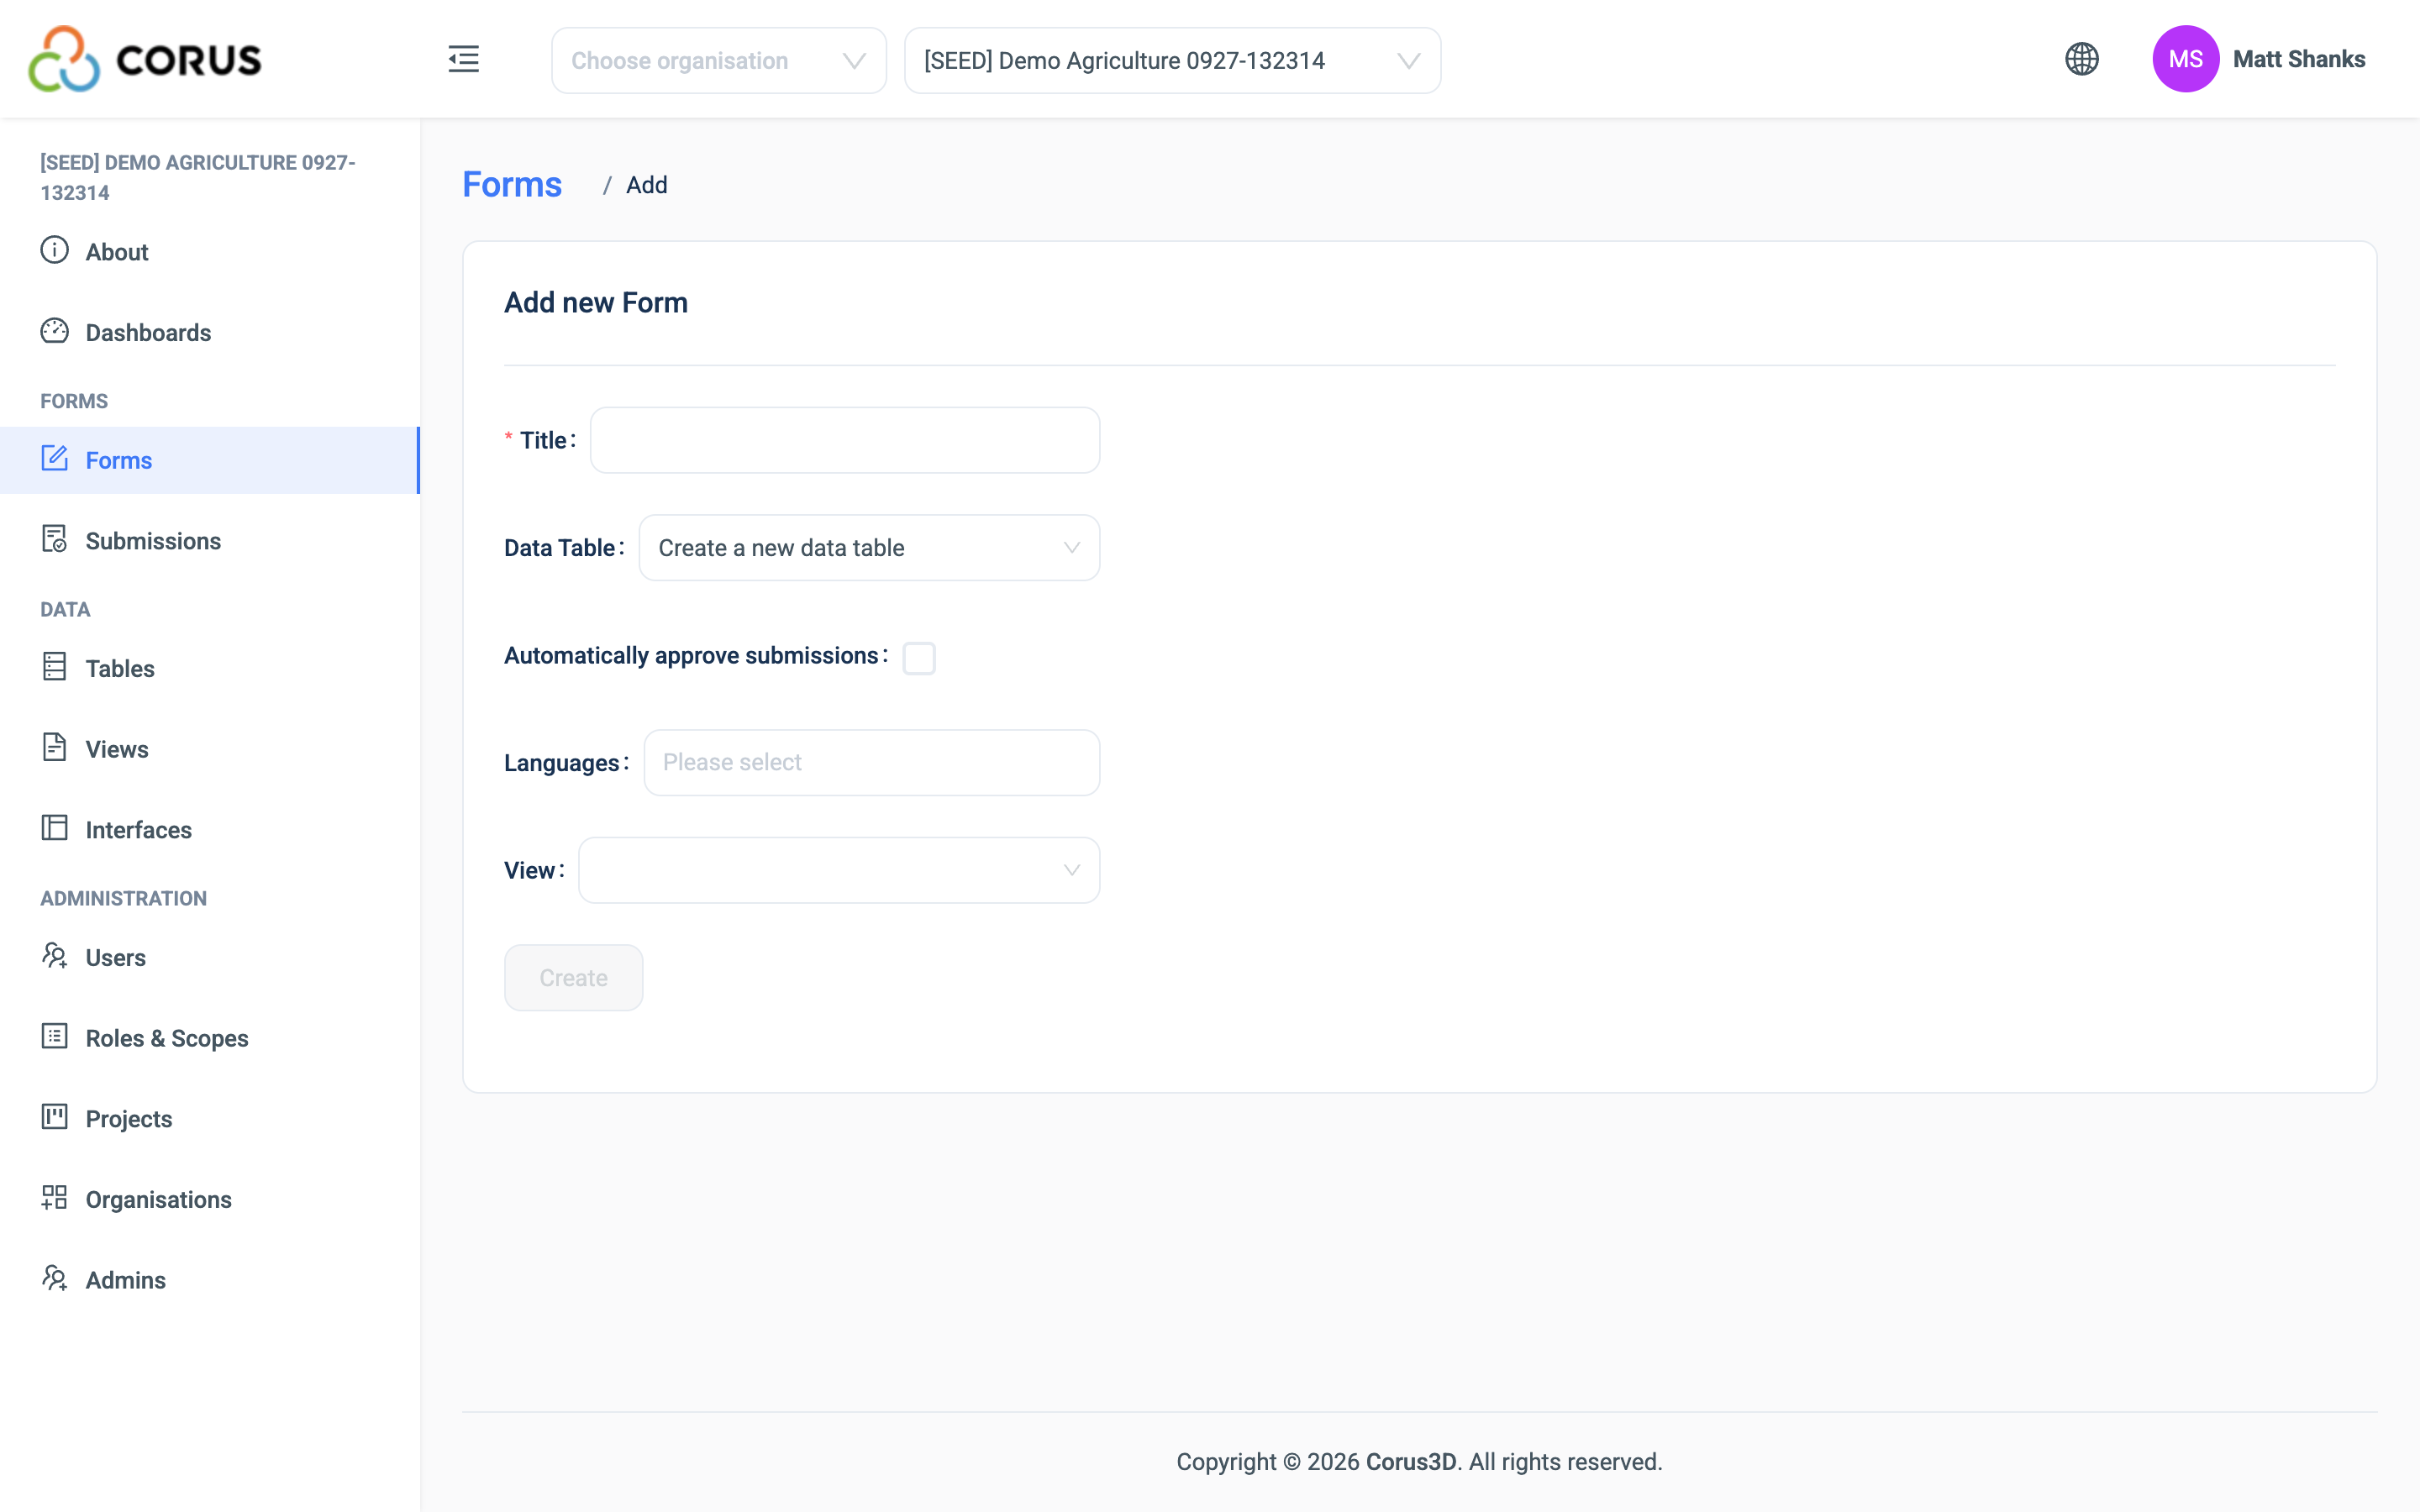
| Setting | Description |
|---|---|
| Title | The name of your form, 70 characters maximum. You can change it later. |
| Data Table | The table that stores the submissions. Create a new data table makes a table that stays in step with the form. You can also choose a table that exists. The form then starts with a question for each field in that table. You cannot change the table after you save the form. |
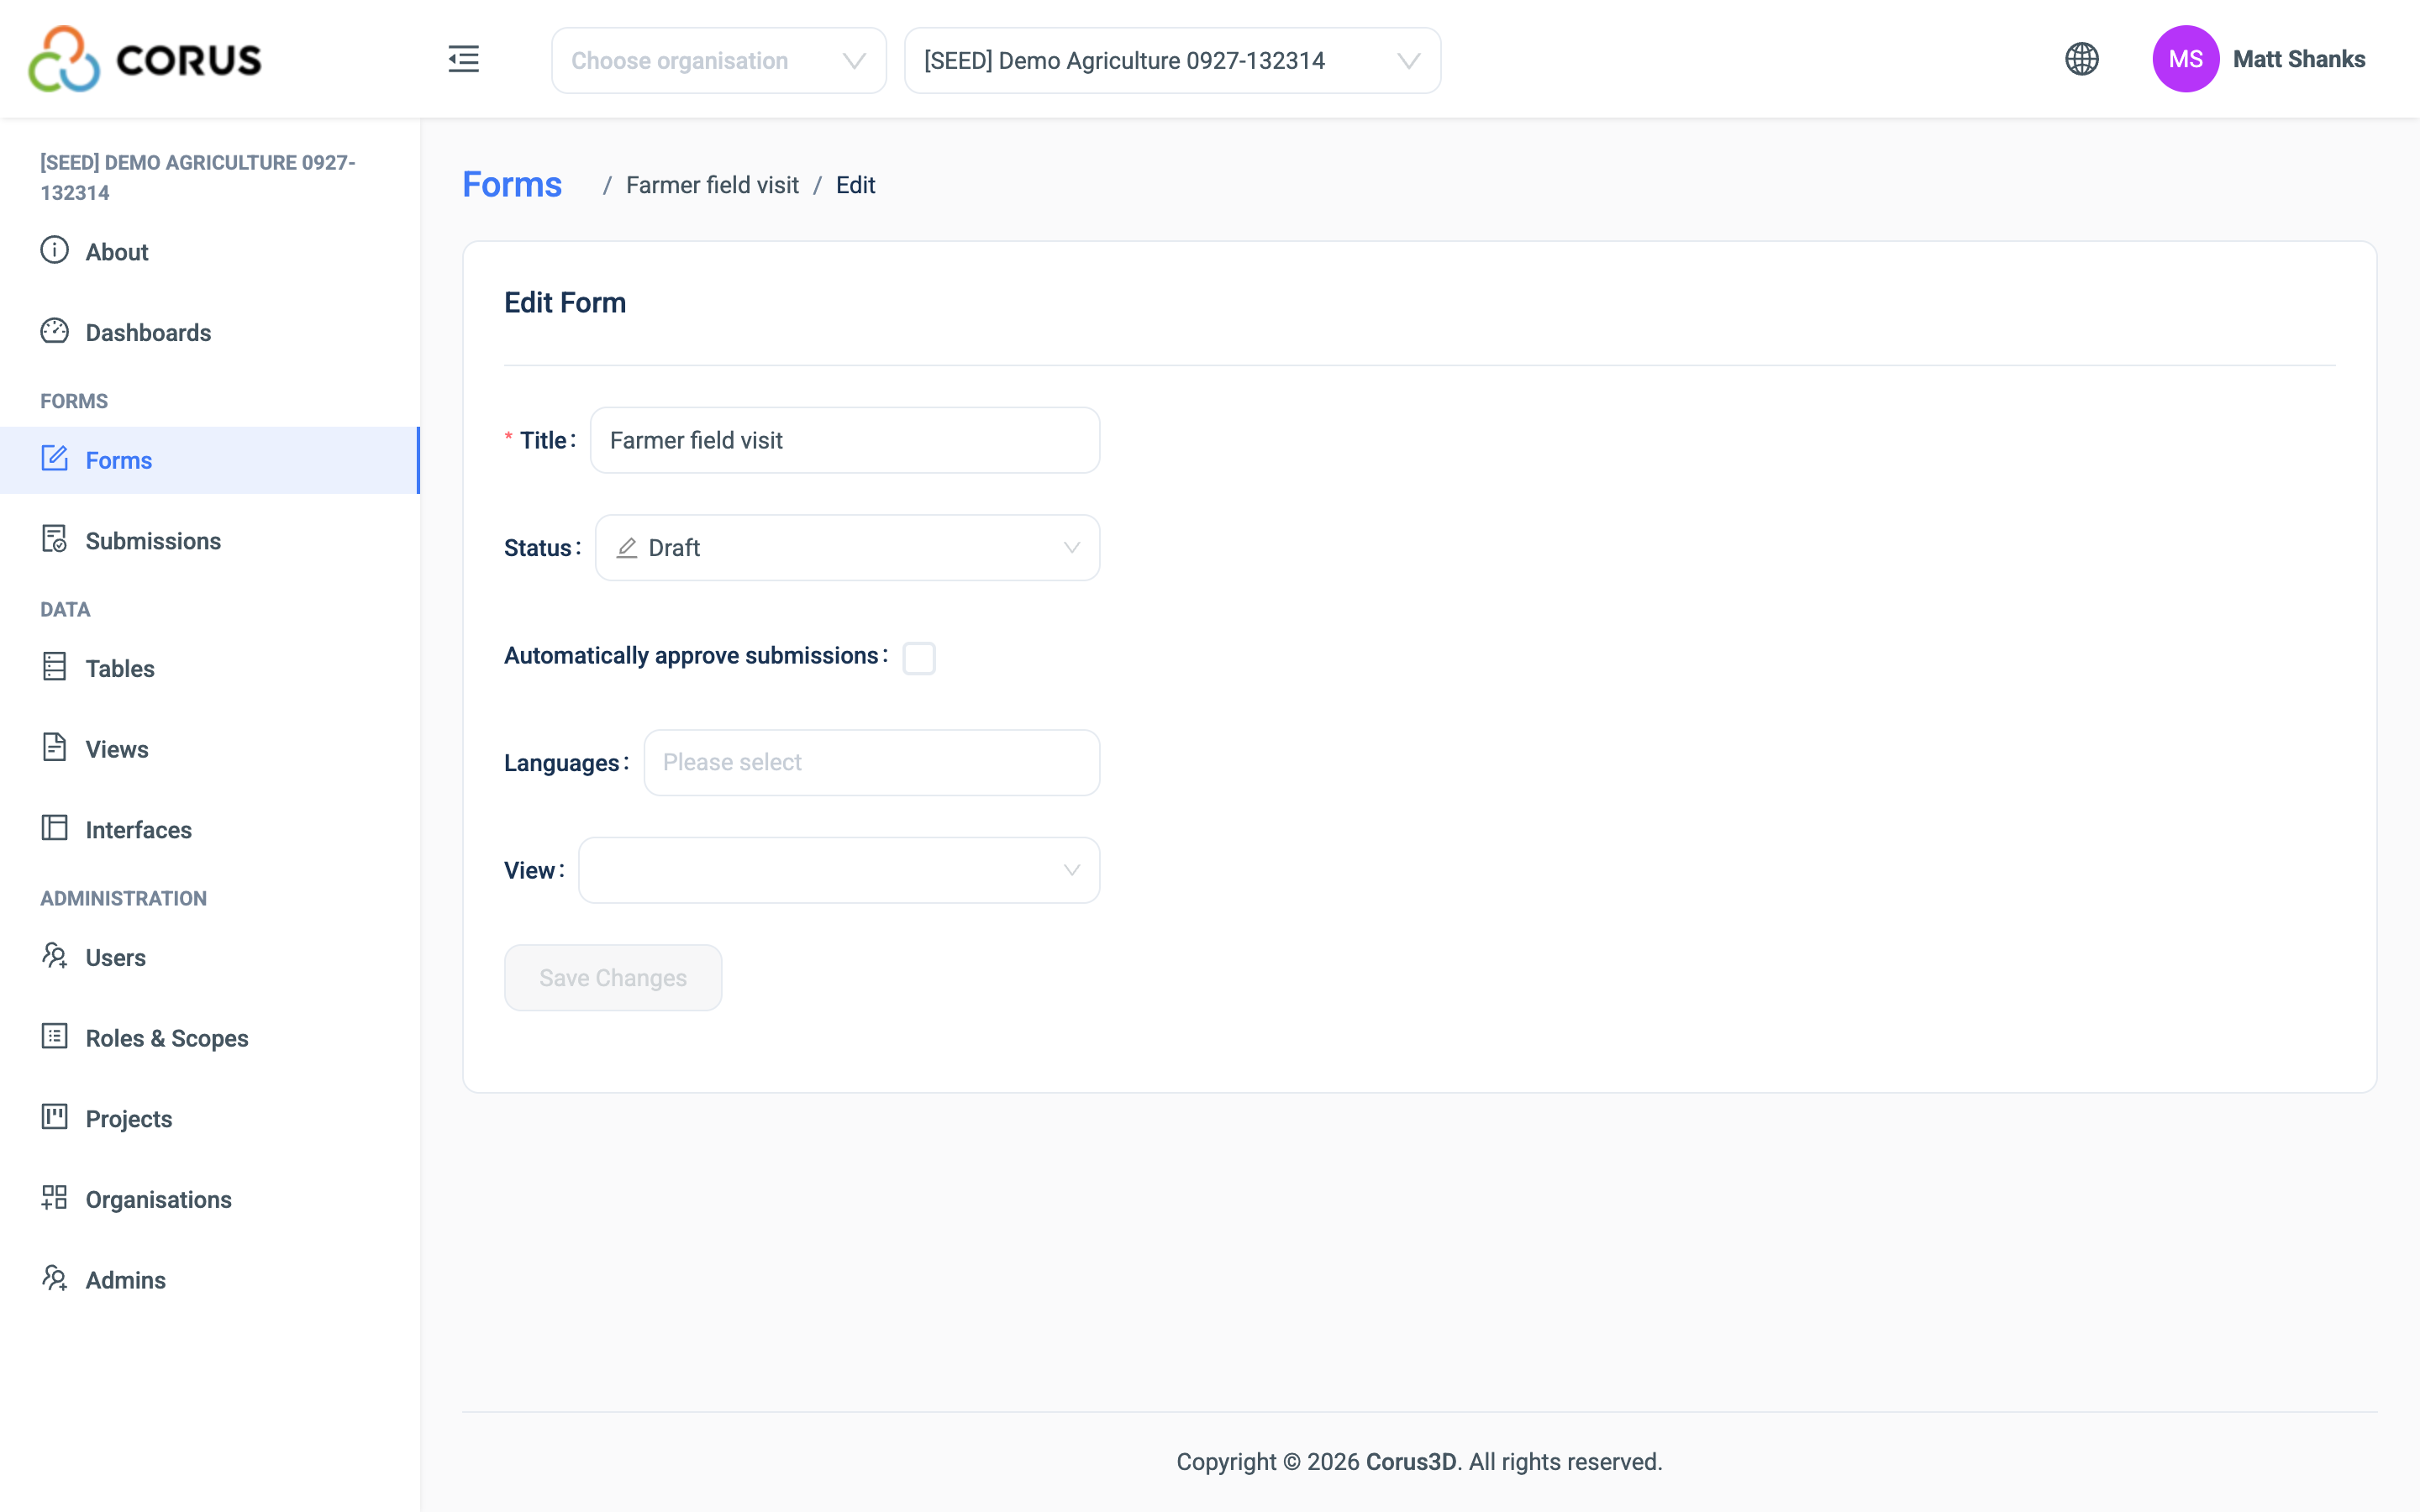
| Automatically approve submissions | When on, each submission goes straight into the data table as a record. When off, someone must review and approve each submission first. See Submissions. |
| Languages | Extra languages for the form. English is always the base language. When you add a language, a translate button appears next to each label. |
| View | The View that drives Inheritance Filters on this form. Leave it empty if the form does not use them. |
When you edit a form later, one more setting appears:
| Setting | Description |
|---|---|
| Status | Draft, Published or Closed. The 3D app only downloads Published and Closed forms. A Closed form still shows its existing submissions on the device, but it does not accept new ones. On the web, the status is a label only. |
Adding a question
After you create the form, add questions with the Add New Input button in the top right corner. The New Input dialogue opens. Here you set what the user sees and how the question behaves.
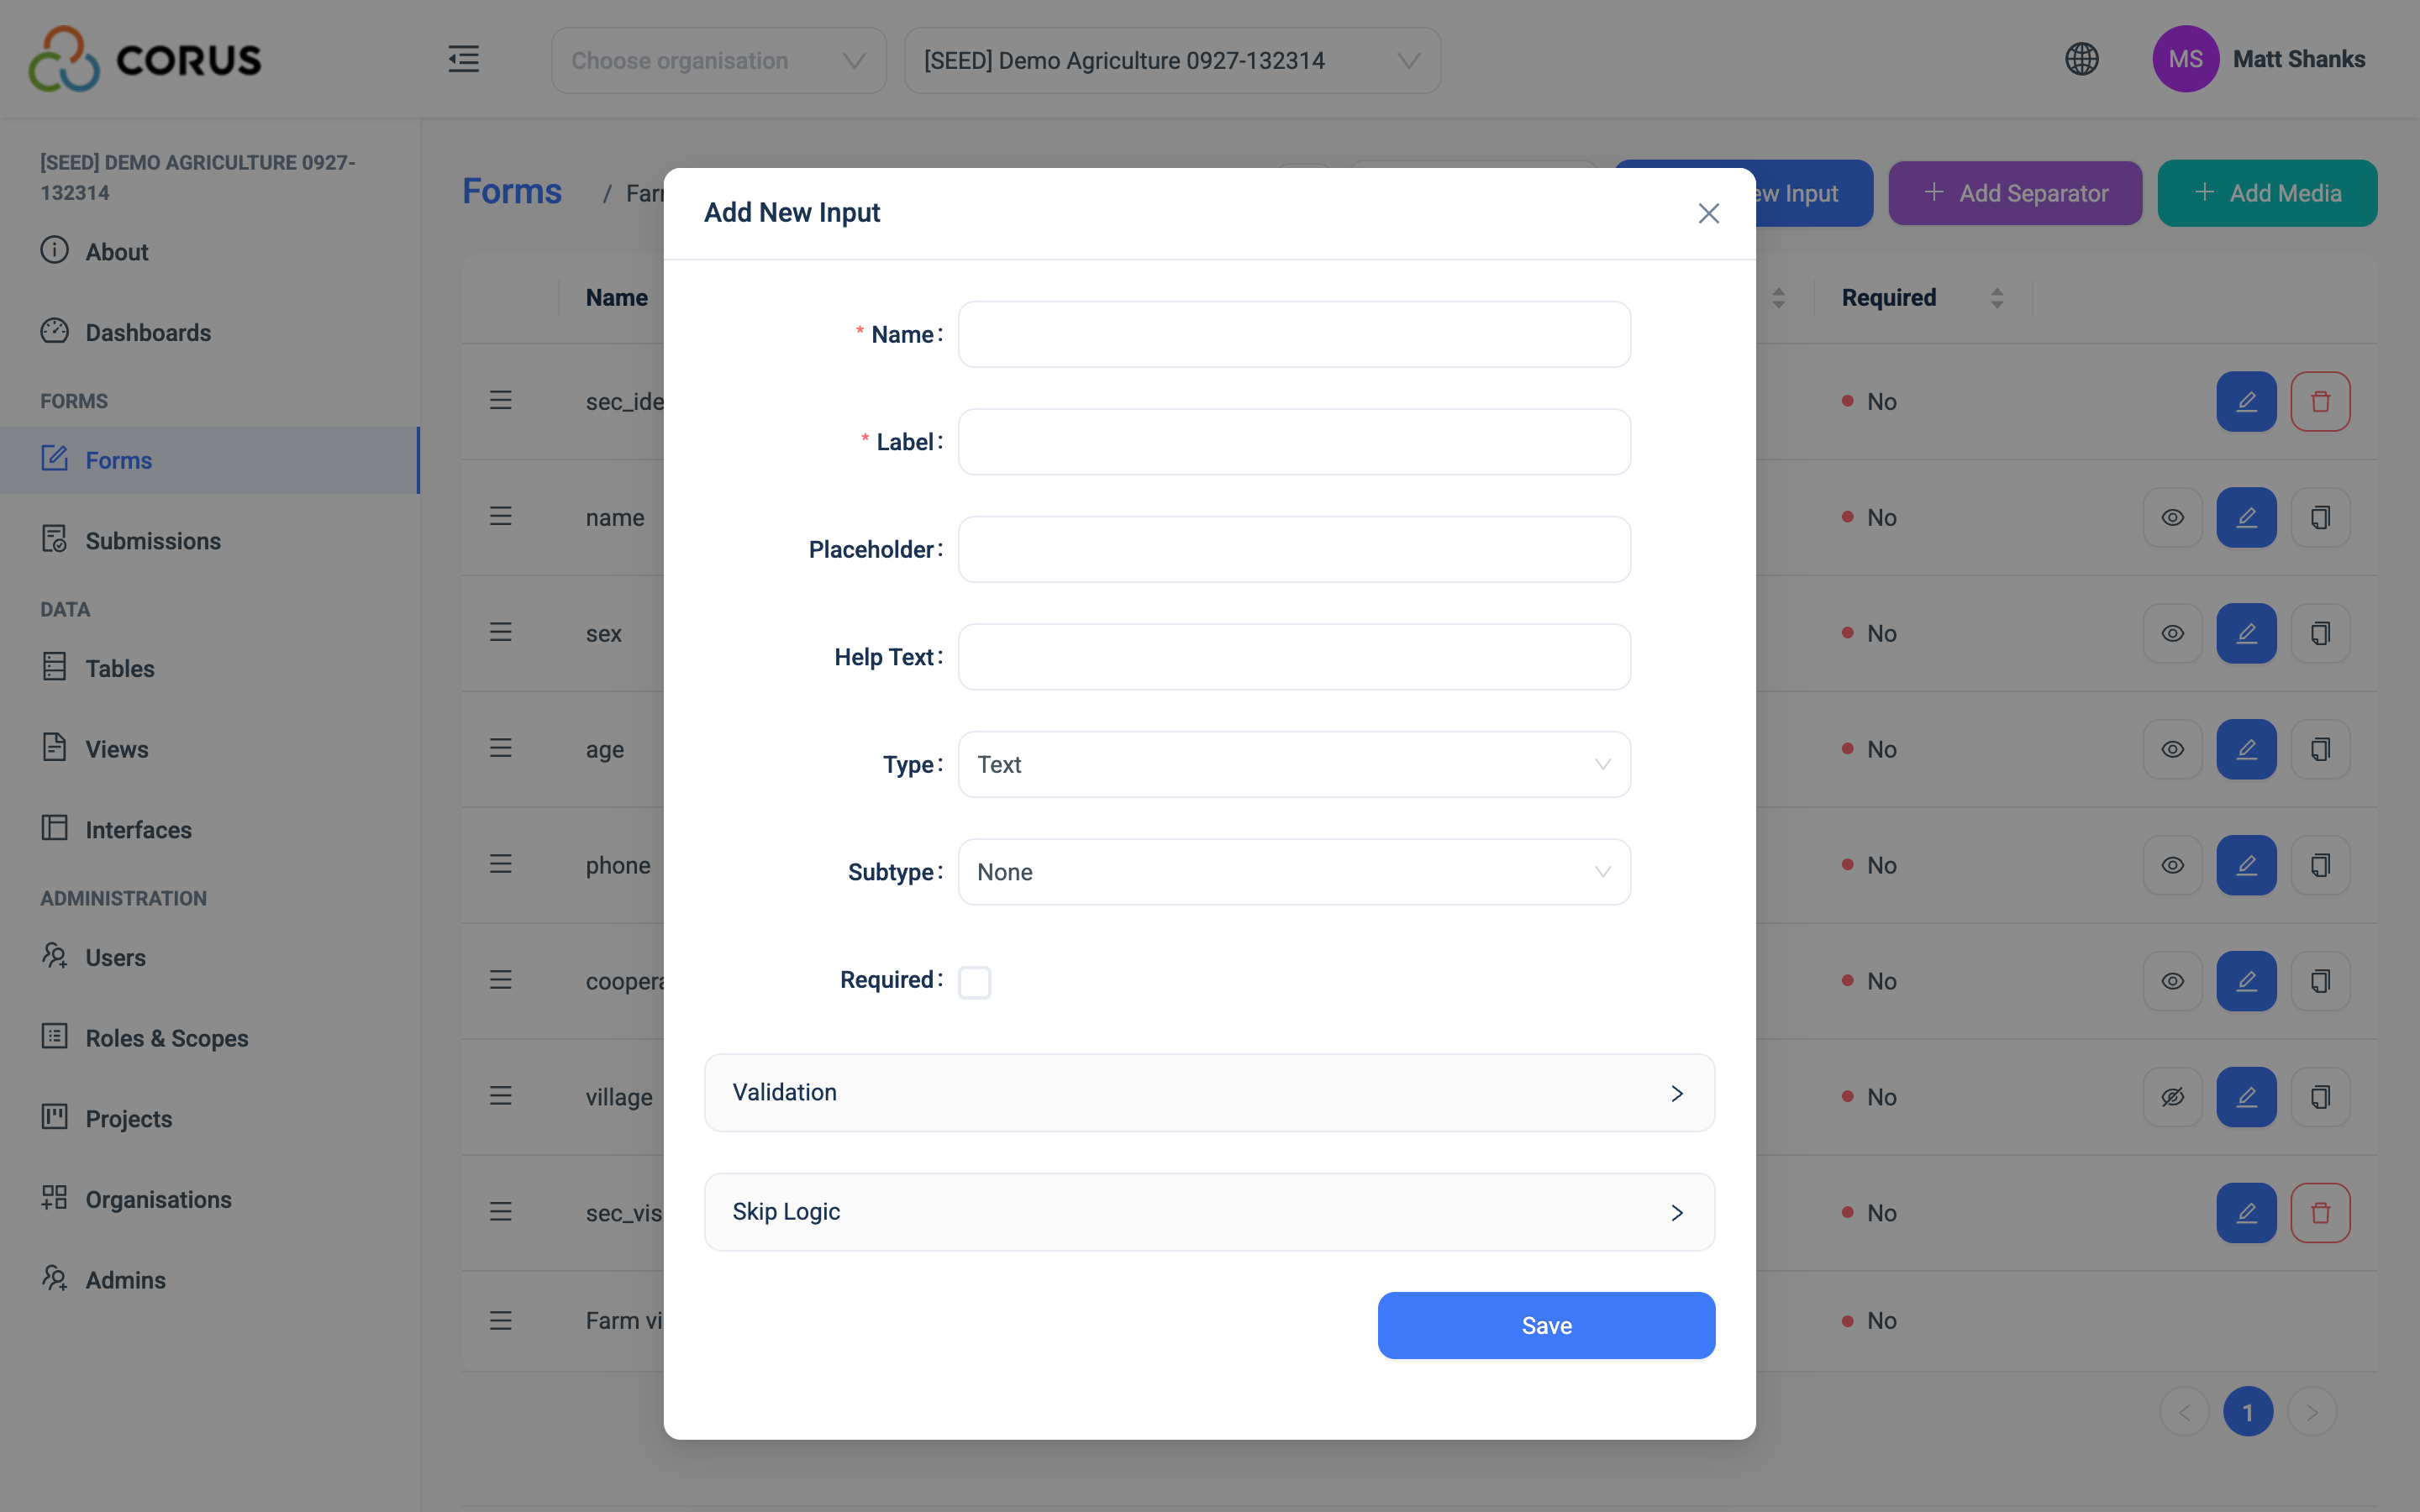
| Setting | Description |
|---|---|
| Name | The column header in the data table. Other parts of 3D use this name to refer to the field, so it has rules. Letters, numbers and underscores only, no spaces, no dots, no $, and 35 characters maximum. For example first_name or phone_number. |
| Label | The question text the user sees. For example "What is your first name?" |
| Placeholder | Grey hint text shown inside an empty answer box. It is a prompt only. 3D never submits it as an answer. |
| Help Text | Extra guidance under the question, such as how to answer or why you ask. |
| Type | The type of the question. See Input Types for every type. |
| SubType | Some types have sub-types. The option only appears for those types. |
| Required | The user must answer this question. The form shows a red asterisk (*) and does not submit without an answer. |
| Validation | Rules that an answer must pass, such as a minimum and a maximum. The rules available depend on the type. See Input Types. |
| Skip Logic | Show this question only when a condition is true, such as a particular answer to an earlier question. See Skip Logic. |
Editing a question
You can change any setting of a question at any time.
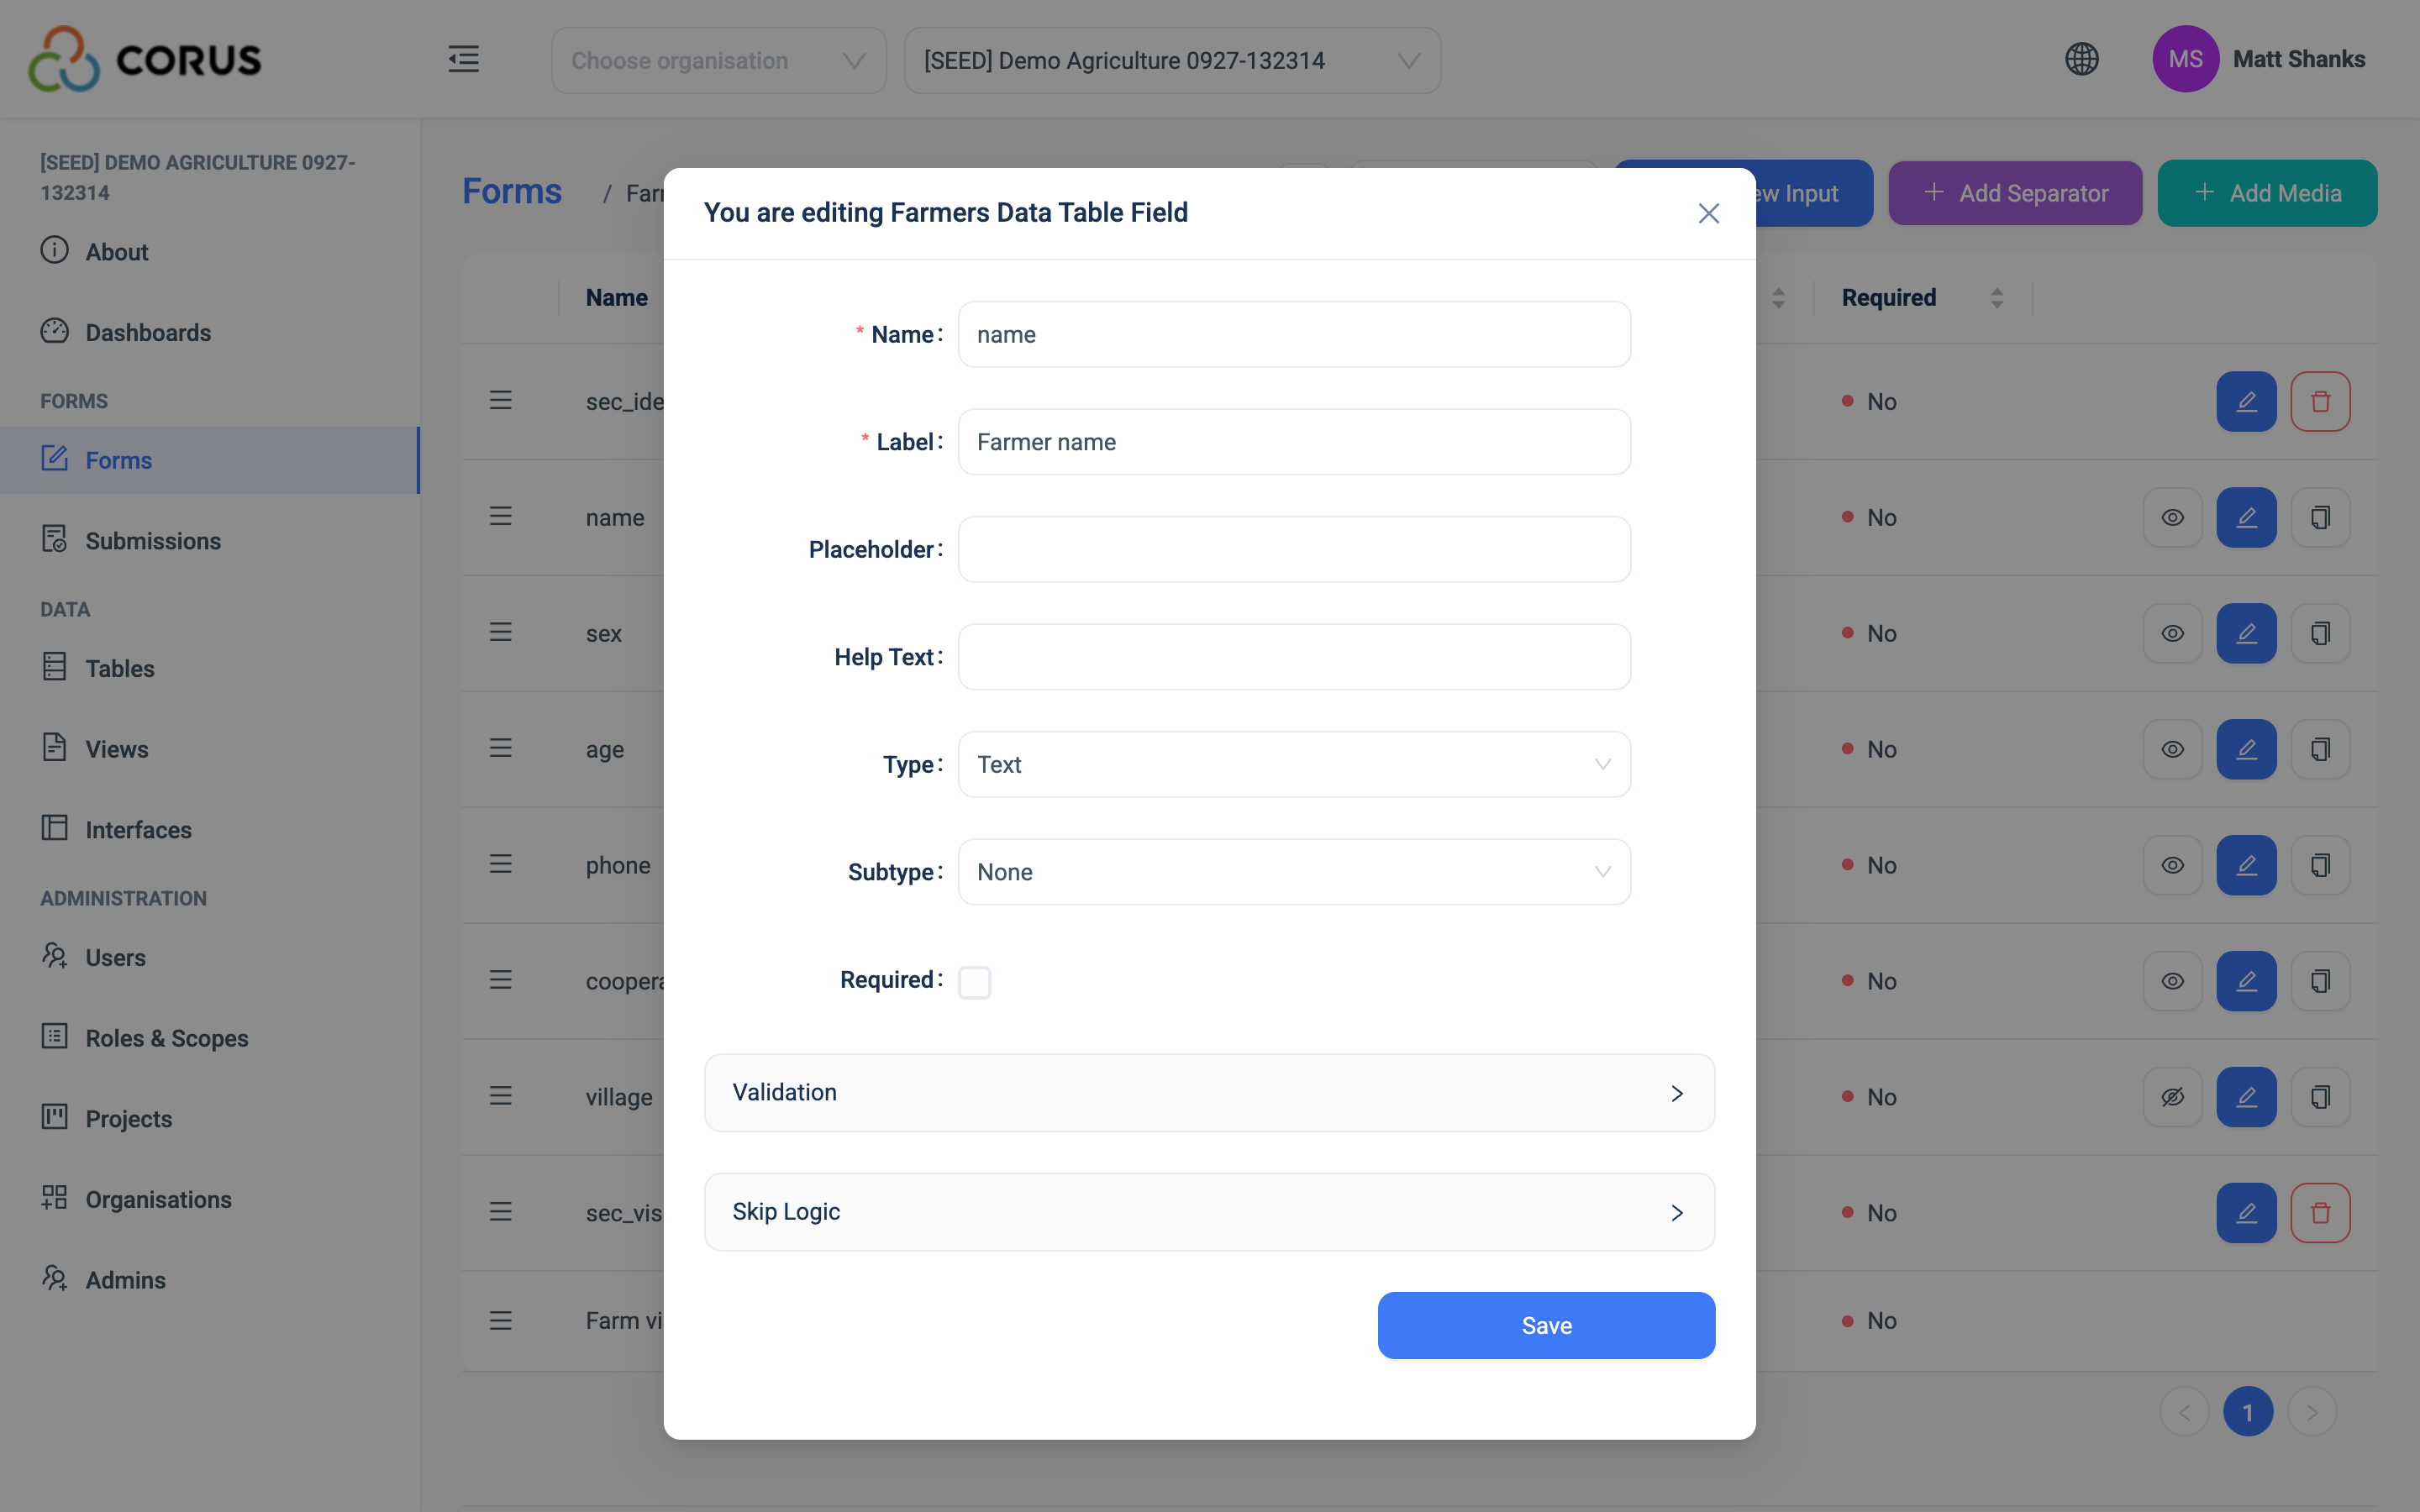
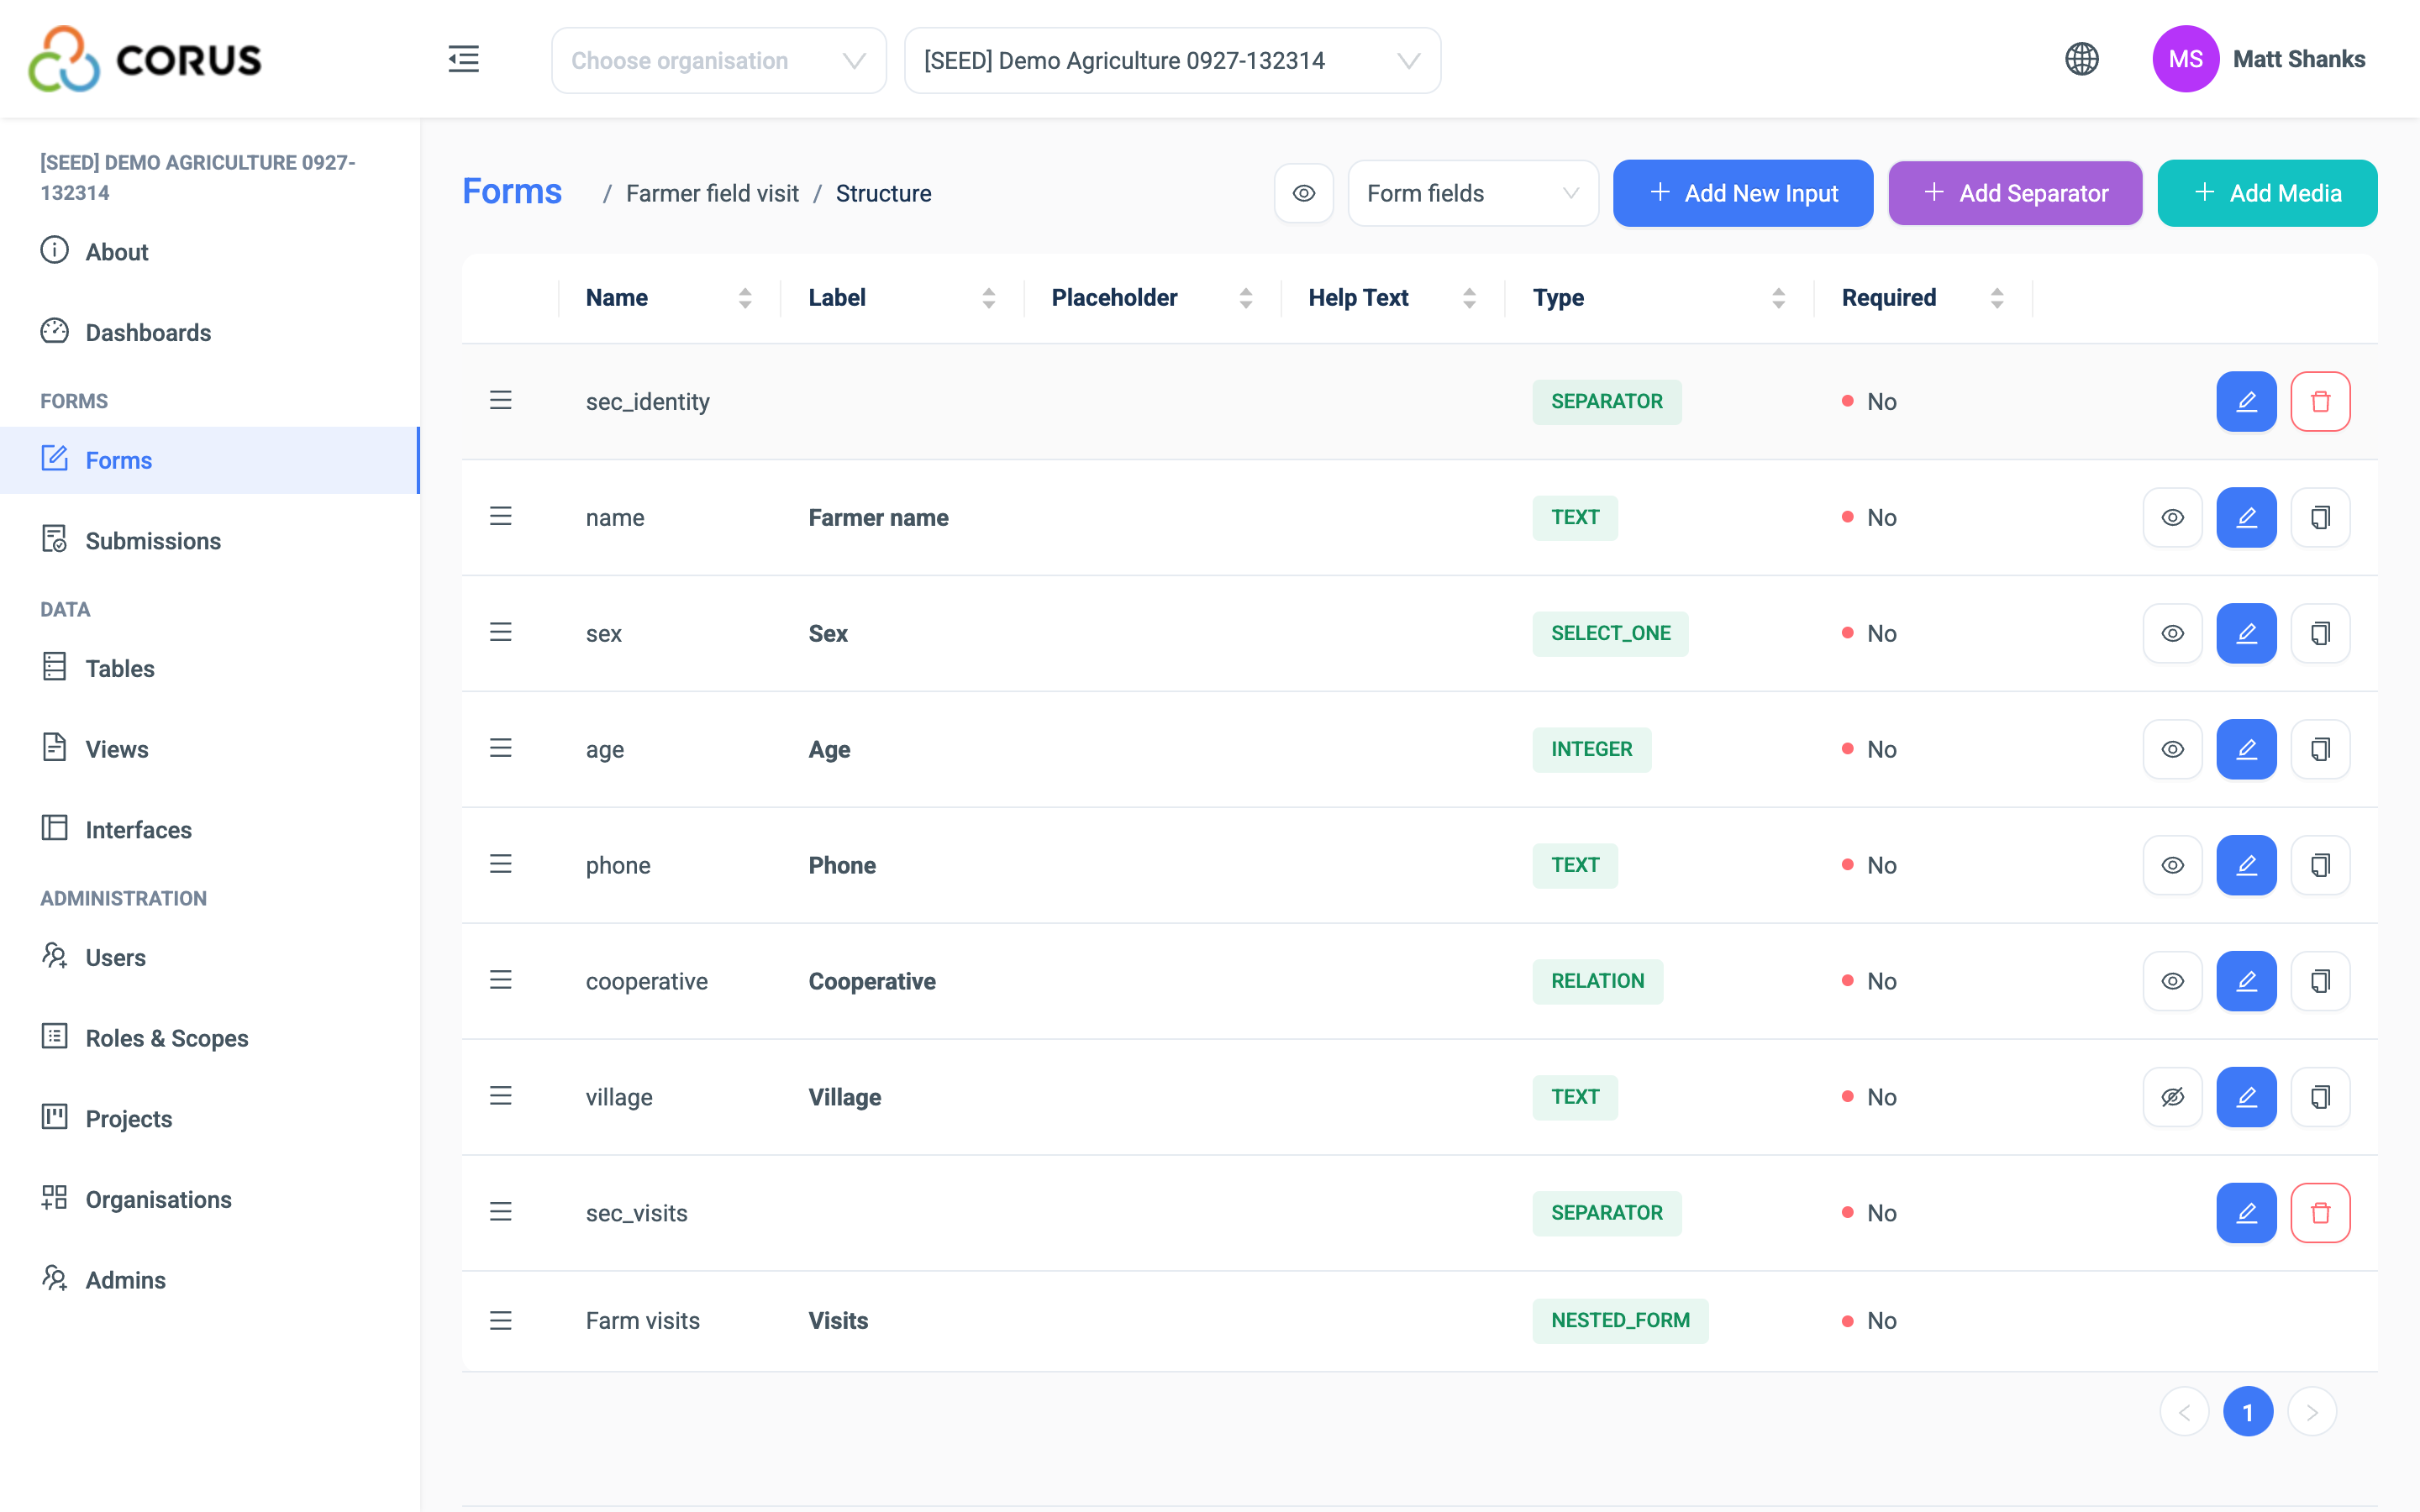
On the Form Structure page, click the blue edit button at the right of the question's row. The same dialogue opens as when you added the question.
Warning
When you change the type of a question, 3D changes the type of the matching column in the data table. If the table already holds records, the stored values may no longer fit the new type.
If you must make a change like this, add a new field instead. Or export the data first, so you can import it again to fit the new structure.
Duplicating a question
Click the duplicate button on a question's row to add a copy of the question with the same settings. This is the quickest way to add several similar questions.
Rearranging questions
Click and hold the three-line handle at the left of a question. Drag the question up or down to its new position, then release.
Hiding a question
A hidden question stays in the form and keeps its column in the data table, but the user does not see it.
This is useful when more than one form writes to the same table. Each form can show a different set of questions and store its answers in the same place.
To hide a question, go to the Form Structure page and click the eye button on the question's row.
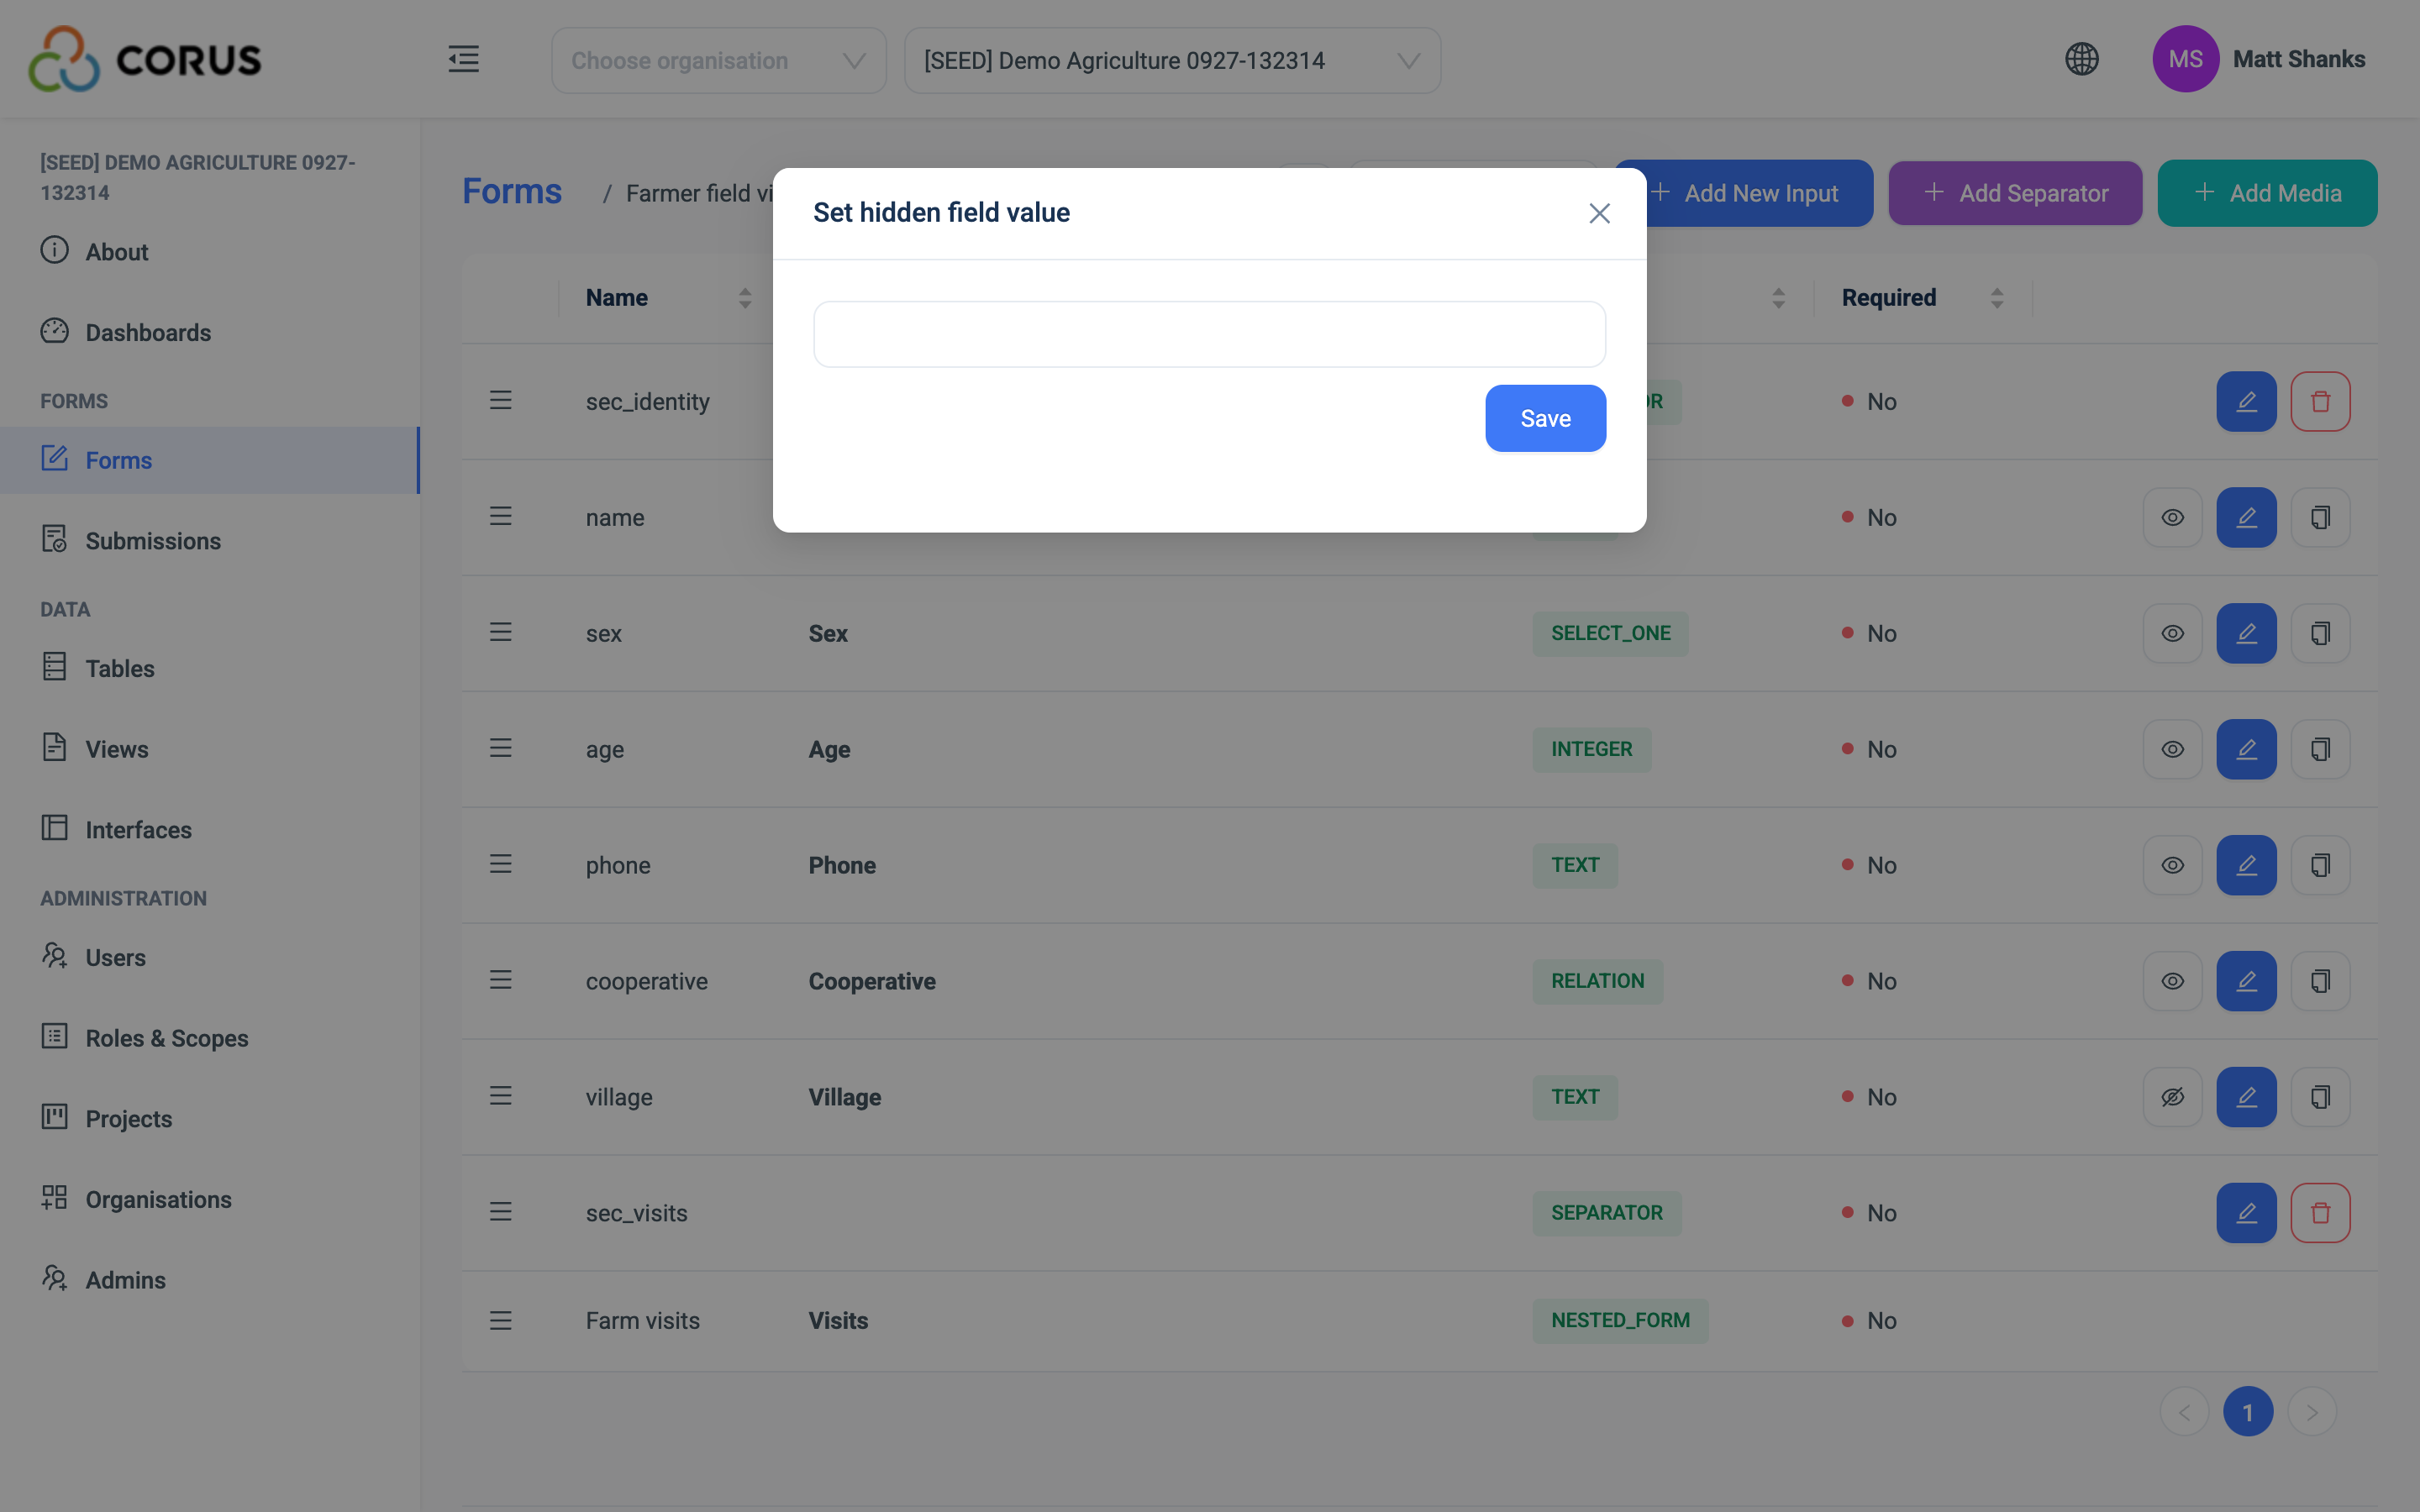
The Set hidden field value dialogue opens. Here you can give the question a fixed answer. 3D submits that answer for every submission, without the user seeing the question. How you enter the value depends on the type.
For a Text question, type any text. For a Relation question, pick one of the related records or leave it blank.
Note
You cannot hide these types: File, Image, Auto Calculated, ID, Nested Form, Separator, Media, and fields that link to a parent table.
Removing a question
The Form Structure page has no delete button for a question. This is because each question is linked to a column in the data table. You have three options.
1. Hide the question and drag it to the bottom. Quick, and the data stays.
2. Take the question off the form but keep the column. Above the question list, change the dropdown from Form fields to Data table fields. Each row has an Enable field switch. Turn it off to remove the question from the form. The column and its data stay in the table.
3. Delete the column. Open the table's Data Structure page from the Tables page and click the red delete button on the field's row. This deletes the column and every value in it, so 3D asks you to confirm. If a calculated field reads this field, 3D warns you first.
Separators
A separator marks the start of a section in your form. It has a heading and a paragraph of text. Use it to give context or guidance for the questions that follow.
To add a separator, click Add Separator in the top right corner of the Form Structure page. Enter the heading and the text.
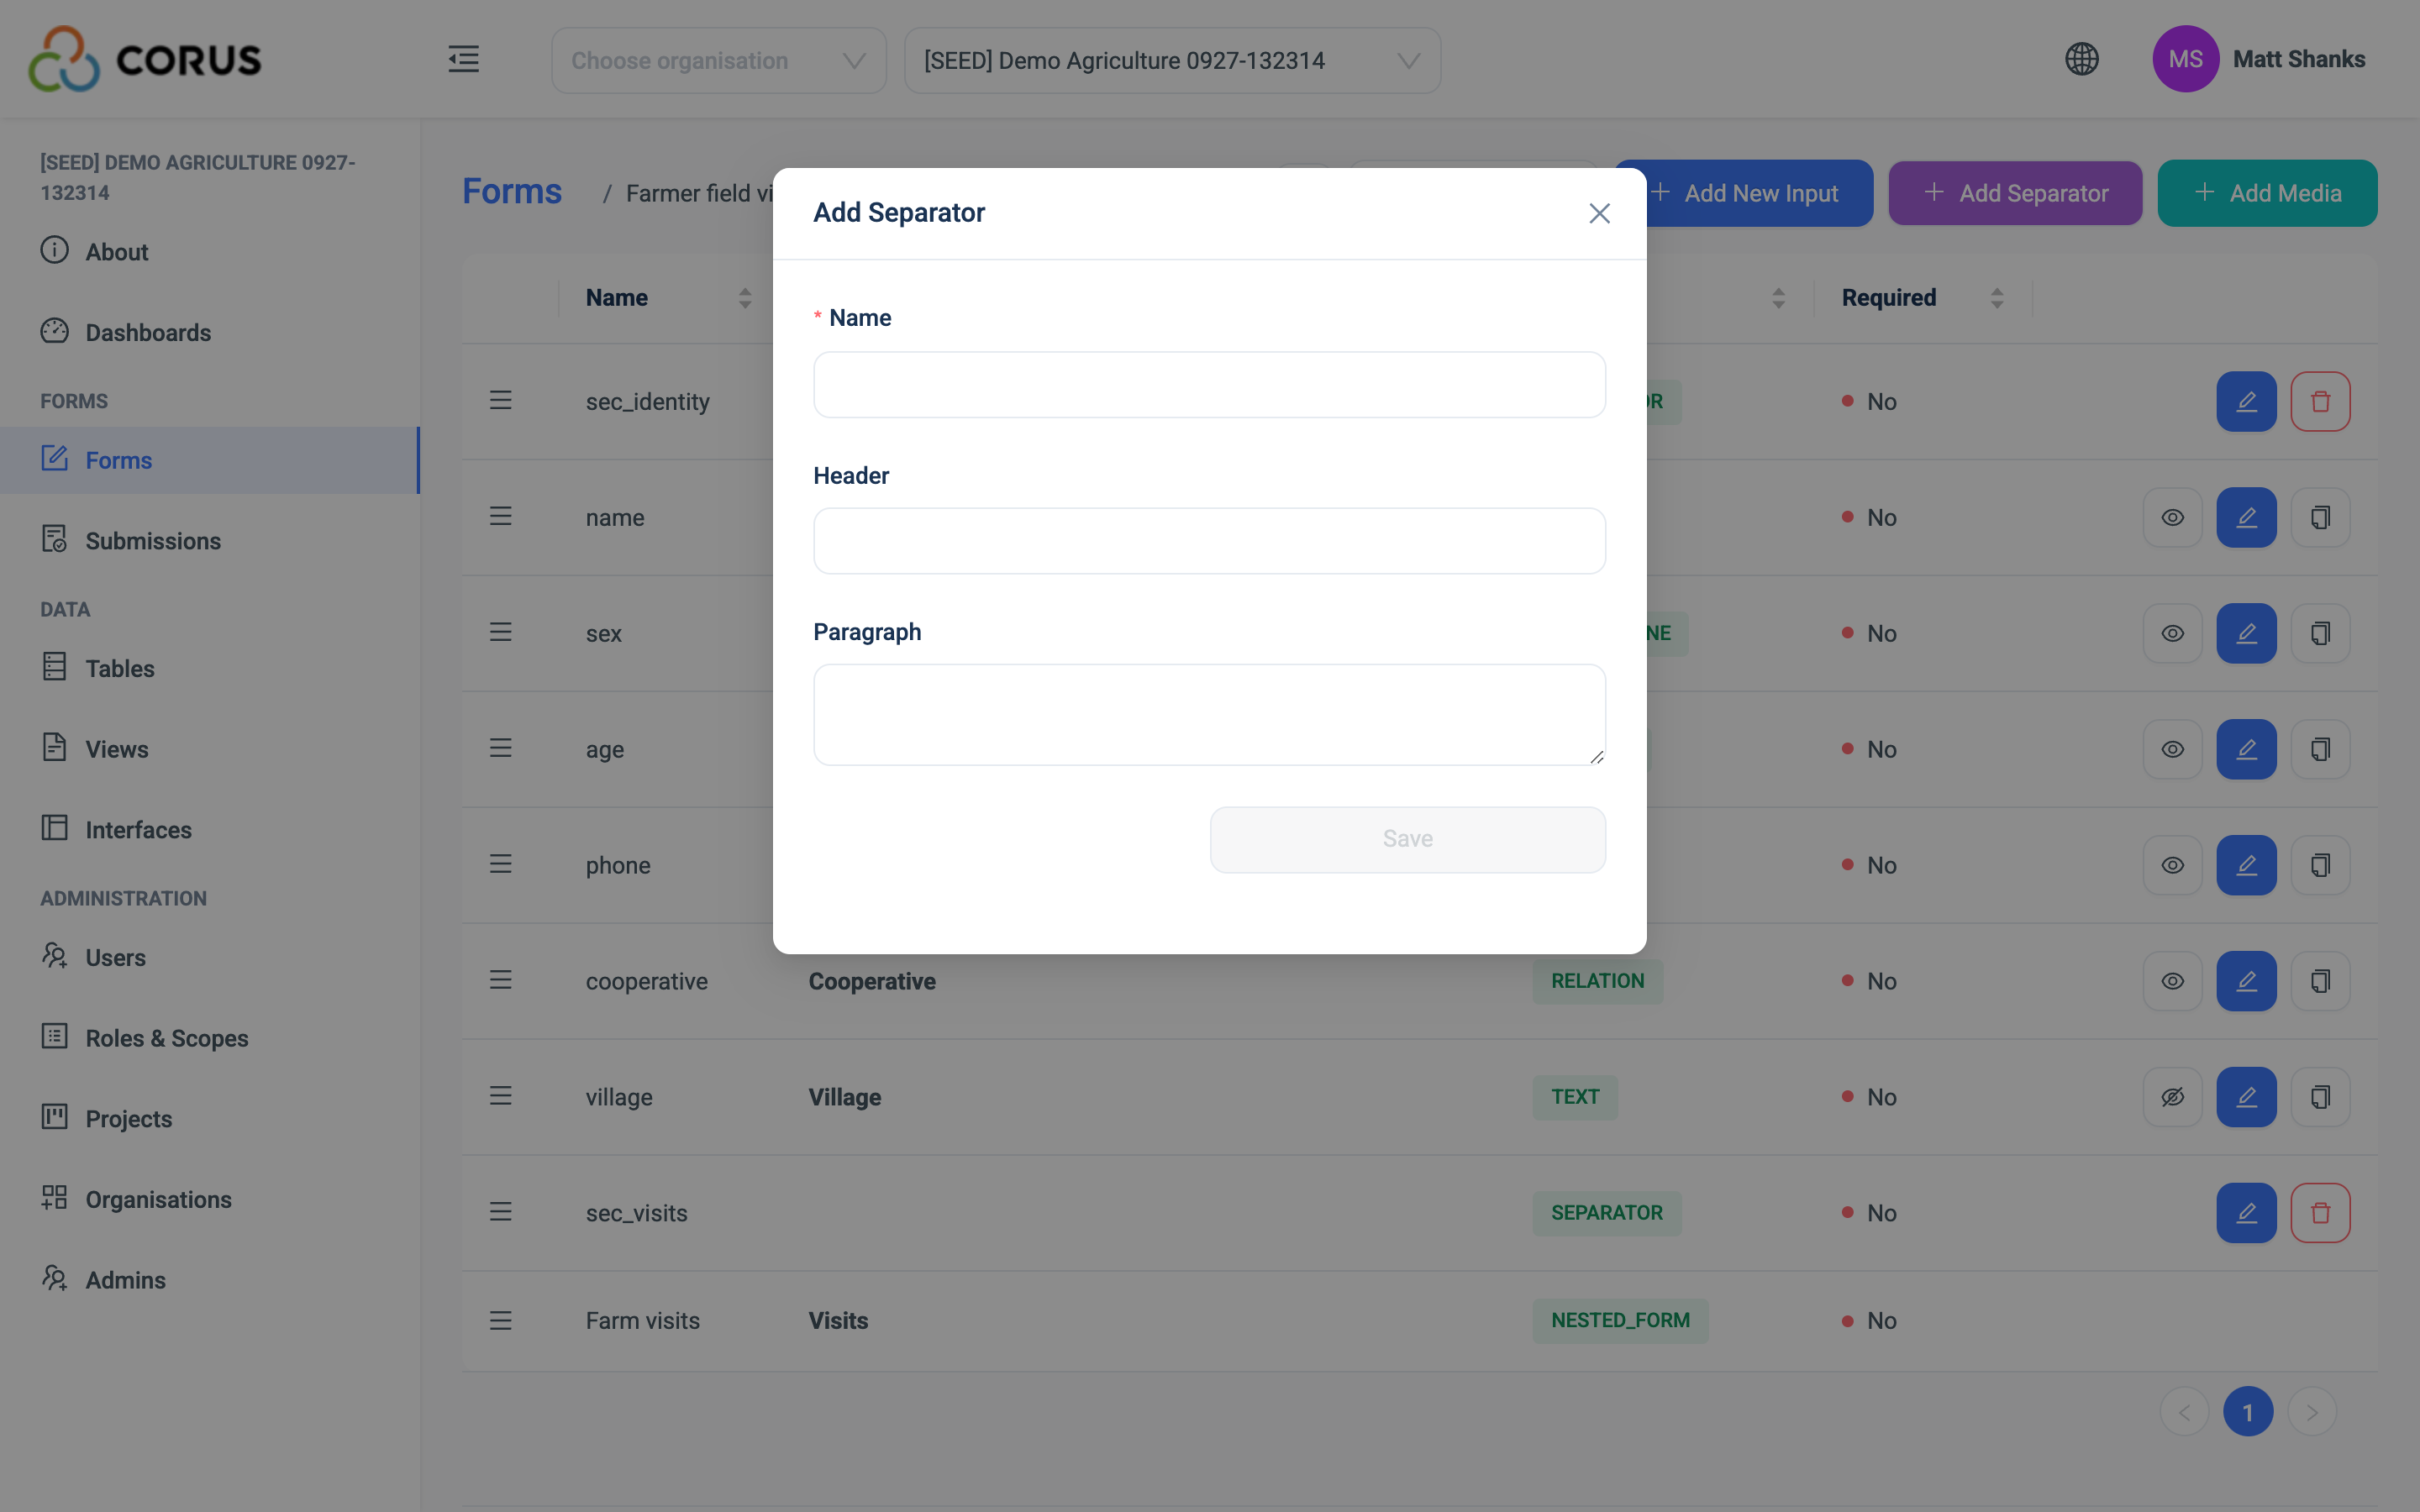
The separator appears at the bottom of the question list. Rearrange it like any other question. You can also edit it, and you can give it skip logic so that the heading appears only when a condition is true. When the form has extra languages, you can translate the heading and the text.
Media
You can add a logo and content images to a form. Click Add Media in the top right corner of the Form Structure page.
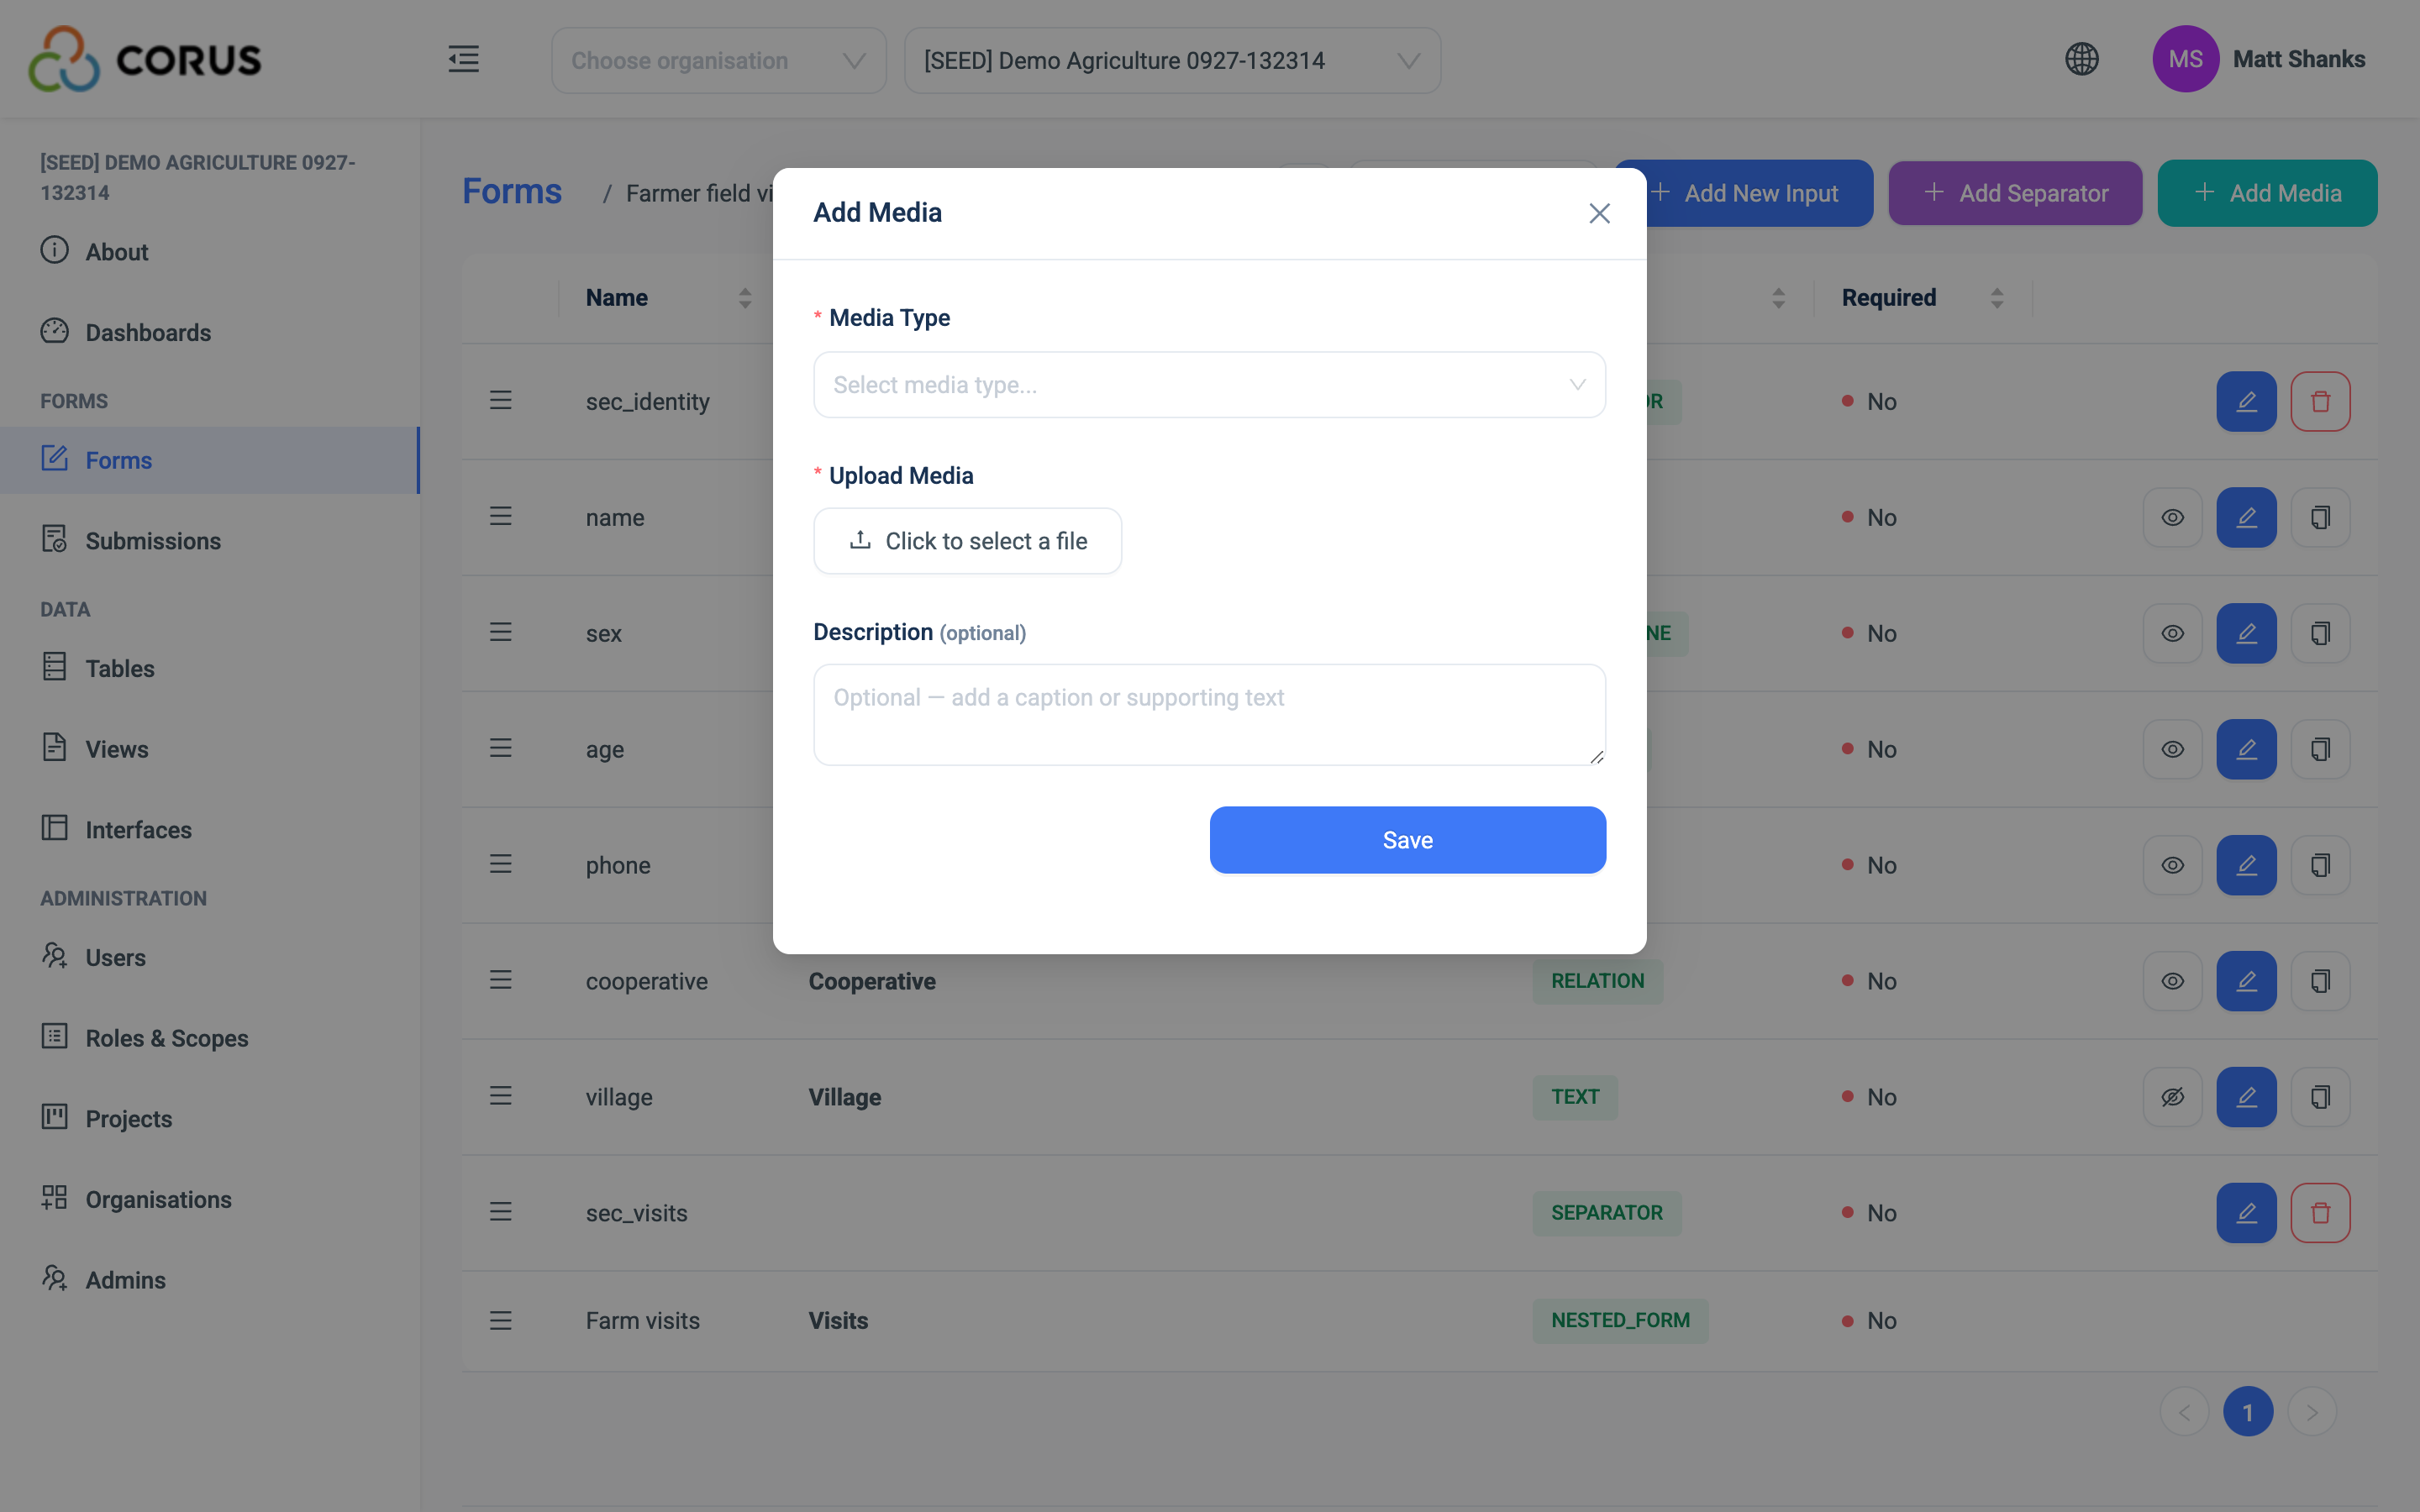
- A logo appears above the form title. A form can have one logo.
- A content image is a row in the question list. Drag it to where you want the image to appear. A content image can have a caption.
Images must be JPEG, PNG, GIF, TIFF, WebP or AVIF, and 2 MB maximum. Media rows never become columns in the data table.
Testing a form
After you add some questions, try the form to see how it feels to complete.
On the Forms page, click View Form in the action buttons at the right of the form's row. On the Form Structure page, the same View Form button, an eye icon, is at the top next to the structure dropdown.
In both cases the form opens in a new tab, as your users will see it.
A web form has two submit buttons. Submit sends the answers. Submit and Fill Duplicate Form sends them and opens a new copy of the form with the same answers, for a run of similar records.
Tip
Complete the form once or twice to check that everything works. Then delete the test submissions, so they do not mix with your real data.
Editing a form
Open the Forms page from the main navigation on the left.
Click the purple wrench button on the form's row, or click the form's title. The Form Structure page opens. Here you add, edit, hide, duplicate and rearrange questions.
Form settings
Open the Forms page from the main navigation on the left.
Click the edit button on the form's row. The Edit Form page opens with the settings from Creating a form, plus the Status. You cannot change the data table here.
Sharing a form
Click Copy Form Link on the form's row to copy the form's web address. Anyone with the link can open the form in a browser and submit it, without a 3D account. Users who are not logged in must pass a CAPTCHA check before they submit.
Public sharing is on for every form in a project unless the project setting Restrict Public Form Sharing is on. See Project Settings.
Deleting a form
Open the Forms page from the main navigation on the left.
Click the red trash button on the form's row. Confirm in the dialogue.
Warning
Deleting a form is permanent. To get the form back, you must create it again.
Deleting a form does not delete its data table. You keep every submission and record.
Form submissions
When a user completes a form, the form goes to the 3D server. The server checks that each answer passes the question's rules before it accepts the submission.
If Automatically approve submissions is on, the submission becomes a new record in the data table straight away.
If it is off, the submission waits in the Submissions page with the status Pending. There, a user with the Manage Submissions permission can edit it, approve it or reject it. An approved submission becomes a record. A rejected submission does not.
Note
A submission that links to a parent record that does not exist yet stays Pending, even when automatic approval is on. This happens when a device syncs a child submission before its parent. The submission is approved as soon as the parent record exists.
To see the records, open the Tables page and click the table that the form uses. See Submissions for the review process in full.