Roles and Permissions
A role is a named set of permissions in a project. Every user has one role in each project they belong to. The role decides what the user can see and do there.
A permission is one thing a user can do, such as view the data tables or manage forms. Roles are made of permissions.
Roles decide what a user can do. Groups decide which rows a user can see. See Groups and Data Scoping.
The Roles & Scopes page
Open Roles & Scopes under Administration in the main navigation. Its first tab is Roles. You see the page if you are a Project Administrator, if you have the Manage Users setting, or if you are a system administrator.
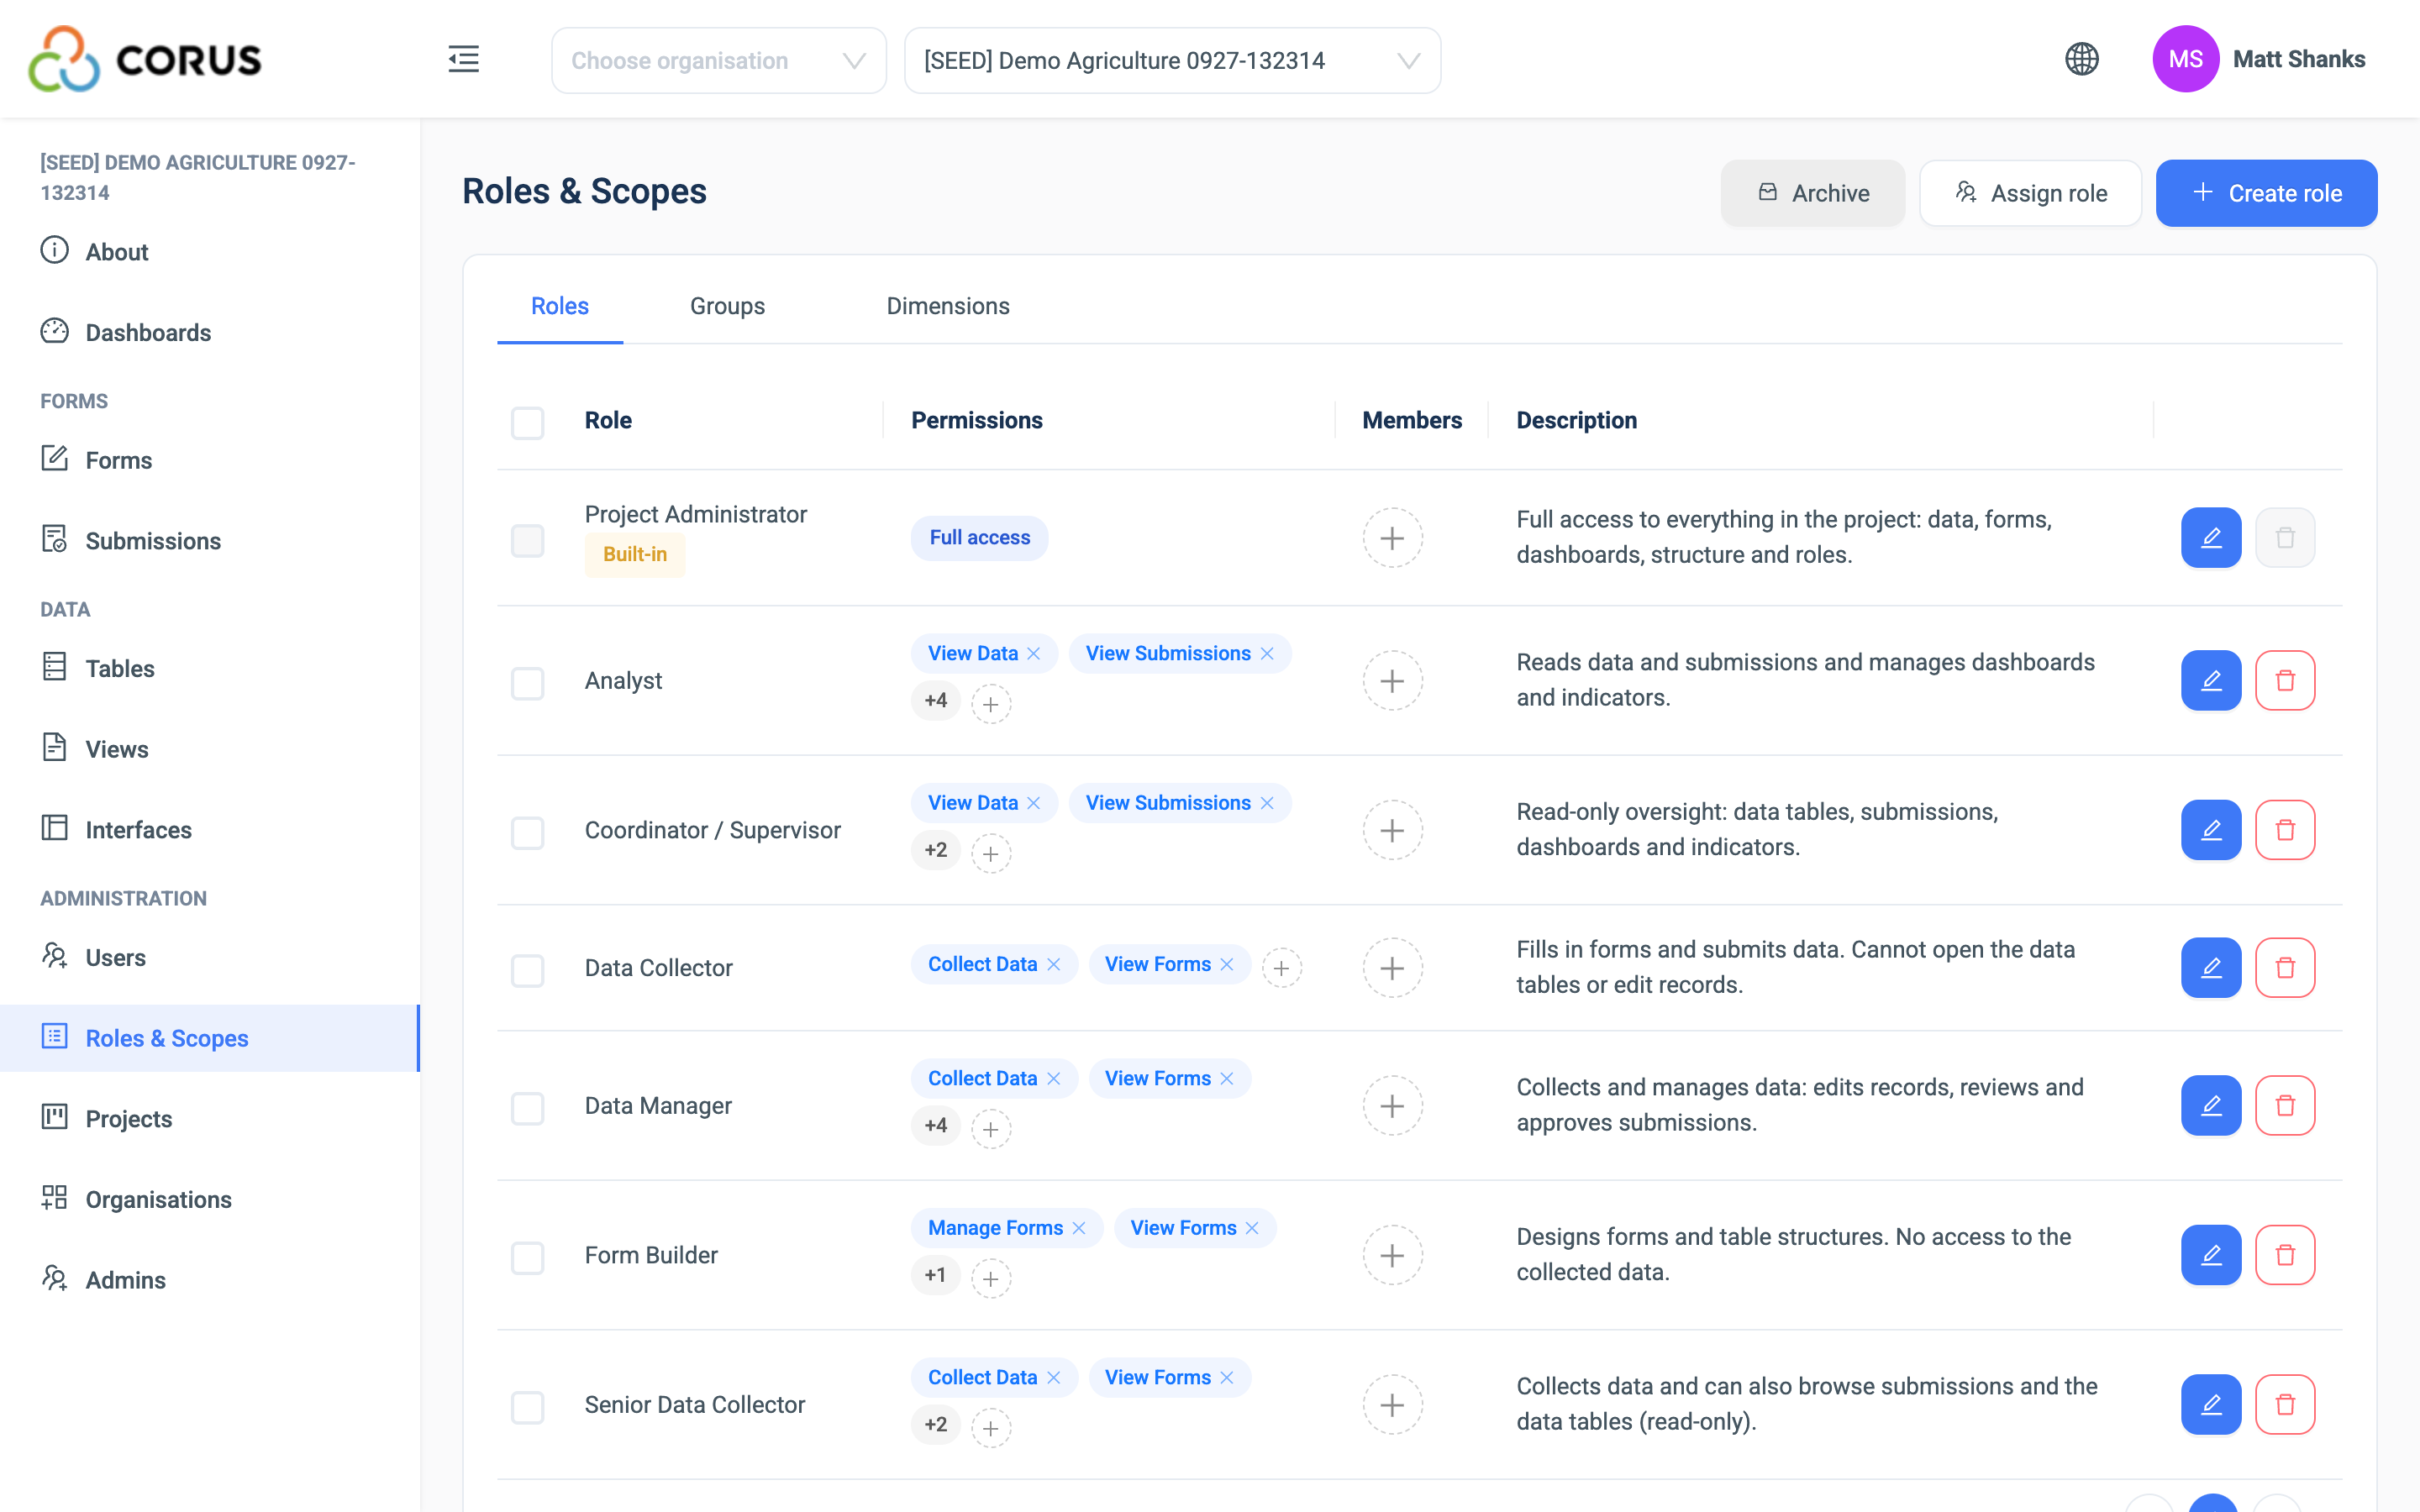
The list shows each role in the current project, with its permissions, its members and its description. Hover over a role anywhere in 3D to see its description and what it can do.
The standard roles
Every new project starts with these roles. You can change any of them except the Project Administrator, and you can add your own.
| Role | What it allows |
|---|---|
| Project Administrator | Everything in the project. Built in, and cannot be changed or deleted. |
| Data Collector | Complete forms and submit data. Cannot open the tables or edit records. |
| Senior Data Collector | Data Collector, plus see submissions and the data tables. |
| Data Manager | Senior Data Collector, plus edit records and approve or reject submissions. |
| Coordinator / Supervisor | See the tables, submissions and dashboards. No data entry. |
| Form Builder | Design forms and tables. No access to the collected data. |
| Analyst | Coordinator, plus manage dashboards. |
Permissions
Each permission stands alone. Manage Data does not include View Data. Give both when a role must see and edit.
| Group | Permission | What it allows |
|---|---|---|
| Data Access | View Data | Open the tables, read records, export them, see record history, and open and export Views. |
| Manage Data | Add, edit, delete, import and bulk-edit records. Create and edit Views. | |
| Collect Data | Submit data through forms. | |
| Manage Data Structure | Create and change tables and fields. Delete Views. | |
| Forms | View Forms | See the forms and their design. |
| Manage Forms | Create, edit and delete forms. | |
| Submissions | View Submissions | See the Submissions page. |
| Manage Submissions | Approve, reject and edit submissions. | |
| Dashboards | View Dashboards | Open the project's dashboards. |
| Manage Dashboards | Add and remove dashboards, and schedule emails. | |
| Interfaces | View Interfaces | Open published interfaces. |
| Manage Interfaces | Build and publish interfaces, and see drafts. | |
| About | View About | Read the About page. |
| Edit About | Edit the About page. |
Every role can open the project. Two more abilities are set outside the role.
- Manage Users is a switch on each user, on the Users page. It lets that user add users, assign roles and manage groups in the project.
- System administrator is set on the Admins page. See below.
Creating a role
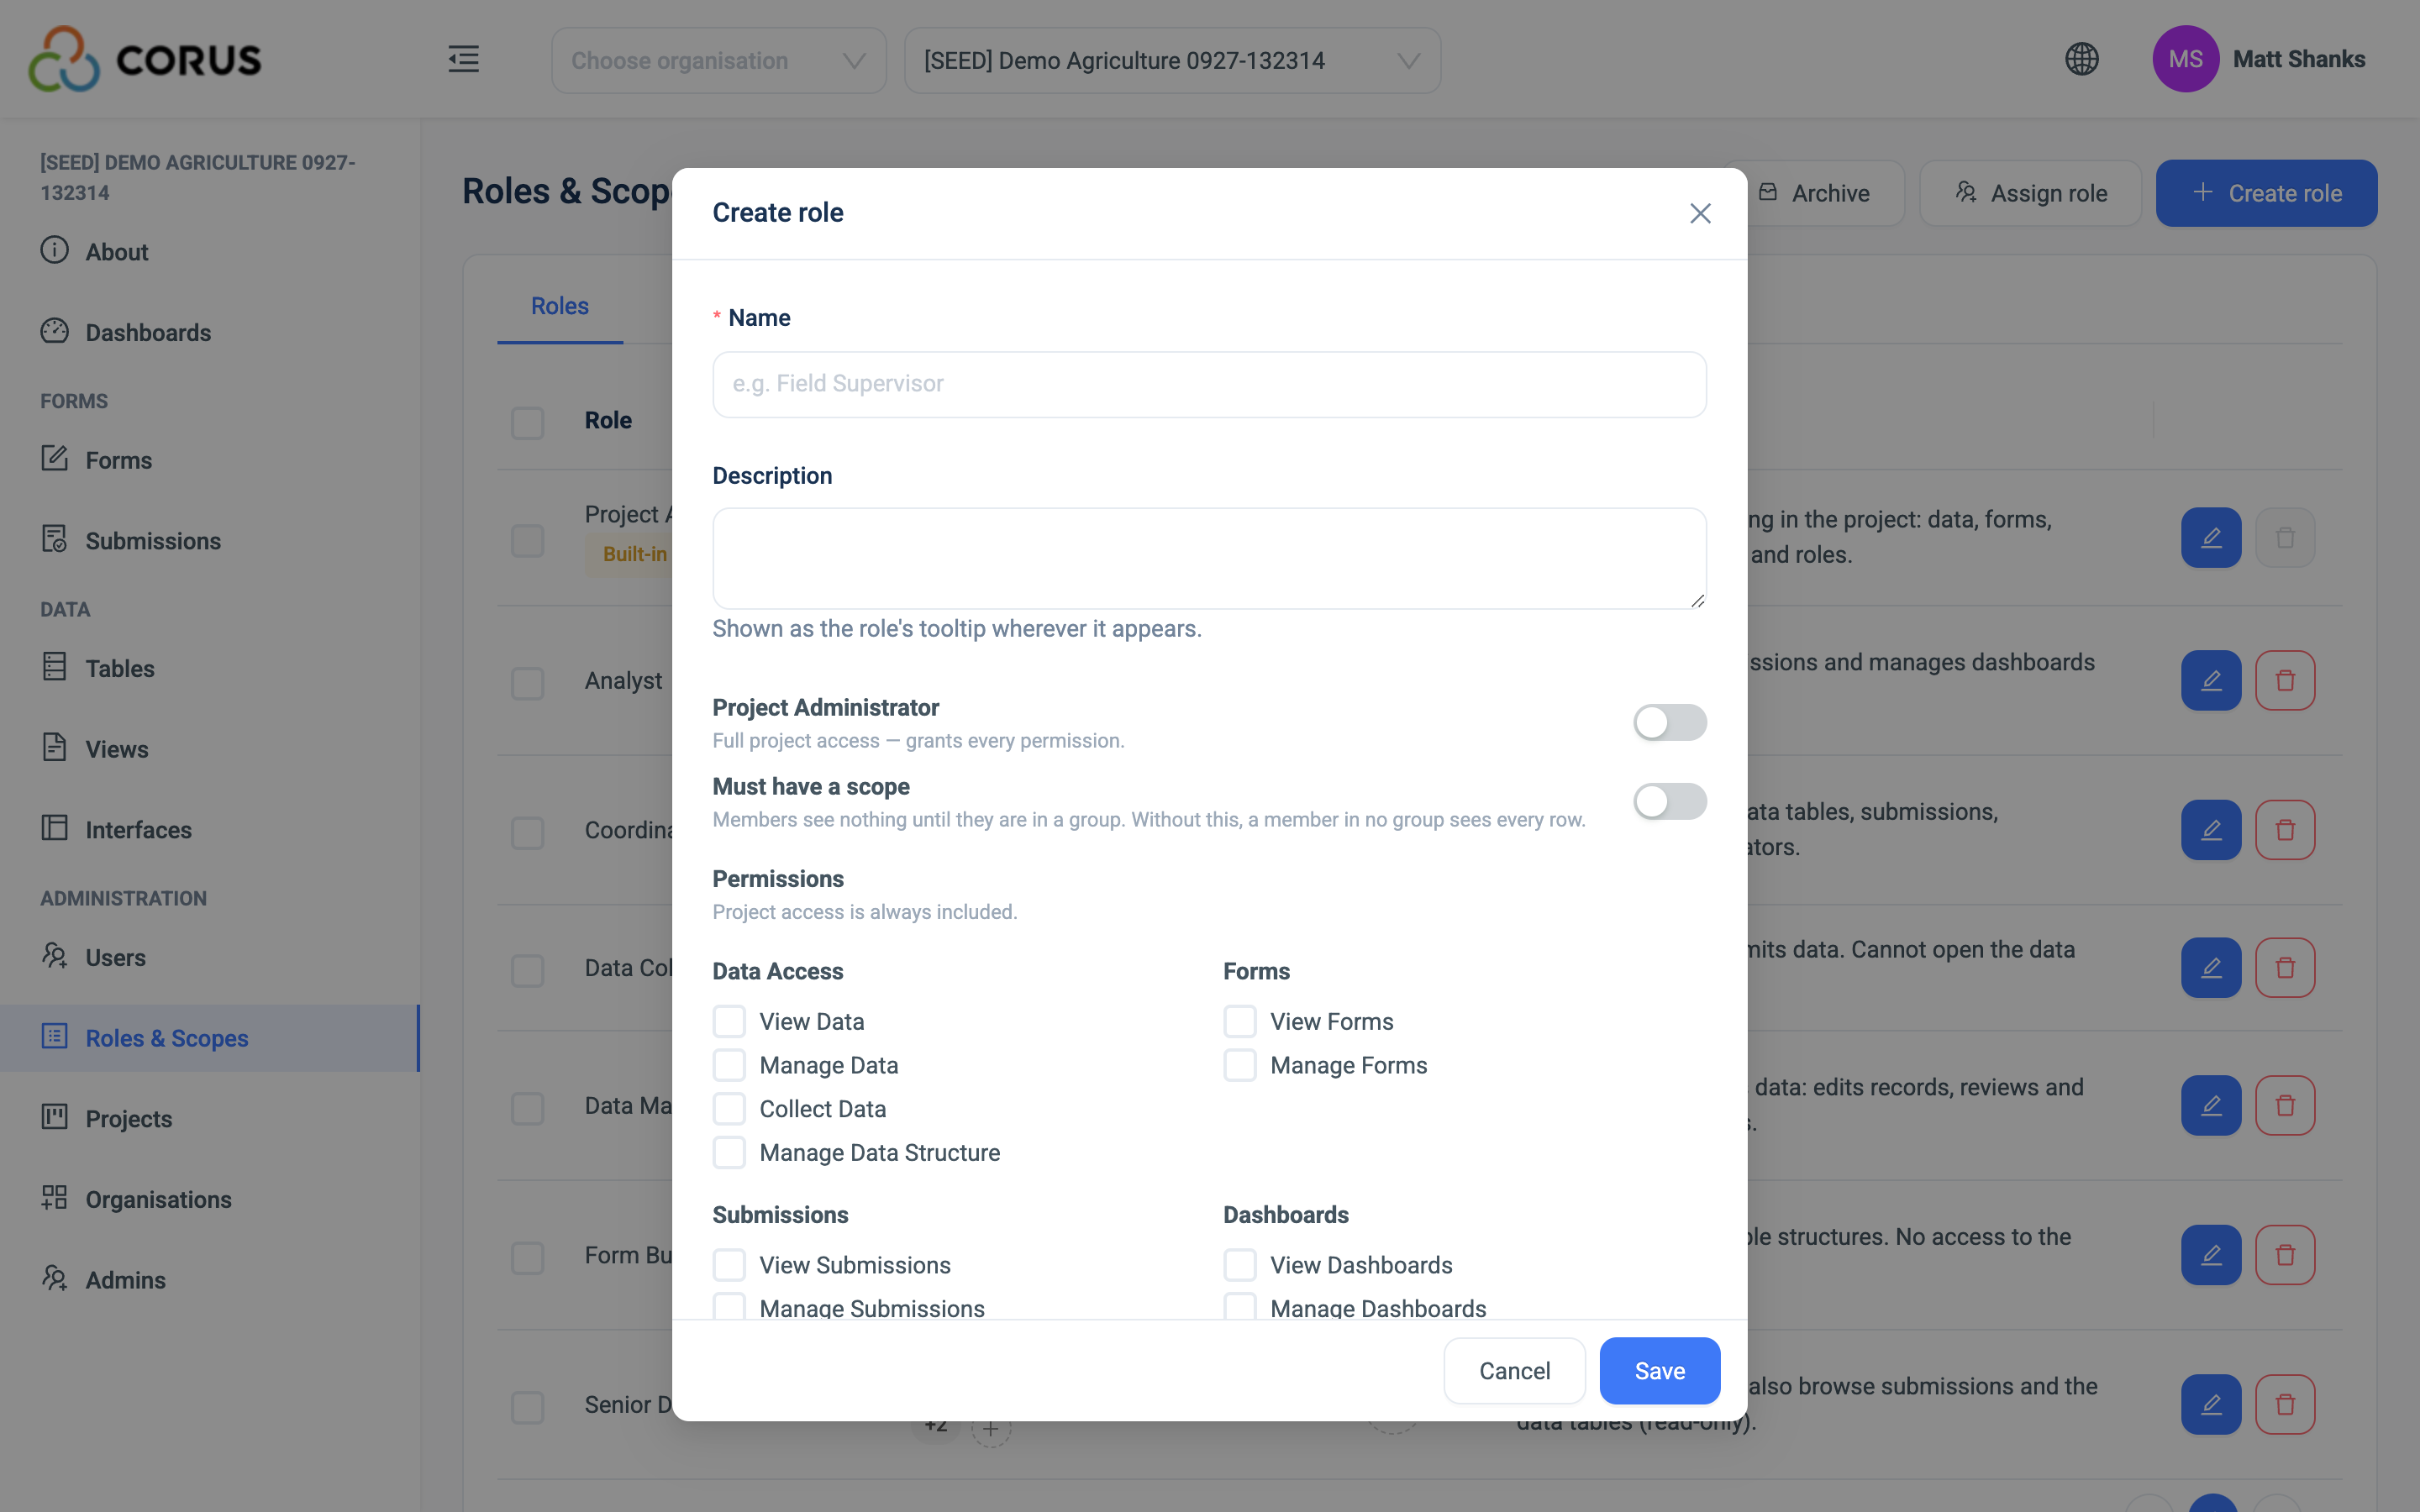
- On the Roles tab, click Create role.
- Enter a Name and a Description. The description appears wherever the role is shown.
- Tick the Permissions the role needs.
- To give the role every permission, turn on Project Administrator instead.
- Turn on Must have a scope if members should see nothing until they are put in a group. See Groups and Data Scoping.
- Under Assign to users, pick users for the role now, or leave it for later.
- Click Save.
Editing a role
Click the edit button on the role's row. Change the name, description, permissions or the switches, and click Save. The change applies to every member at once.
You can also change the permissions in the list. Click + in the Permissions column.
Deleting a role
A role with members cannot be deleted. Move the members to another role first.
Click the red delete button on the role's row and confirm. The role goes to the Archive, from where you can restore it.
Assigning a role
A user has one role per project. Assigning a new role replaces the old one.
- Click Assign role, or click + in the Members column of the role's row.
- Choose the Role.
- Choose the Users. 3D warns you when a user already has a role in the project, and shows which role it replaces.
- Click Assign.
The same dialogue lists the current members, with a button to remove each one. A removed user keeps their groups.
The Role dropdown on the Users page does the same thing for one user at a time.
Restricting a form to roles
By default, every member of the project can open every form. To limit a form to some roles, use the Assigned roles column on the Forms page. Click + and tick the roles. Only members of those roles then see the form, on the web and in the app.
A form with no assigned roles stays open to the whole project. See Forms.
System administrators
A system administrator manages the whole 3D platform. They can open every Organisation and project, create and delete projects and Organisations, manage users and roles everywhere, and add other administrators. Data scoping does not limit them.
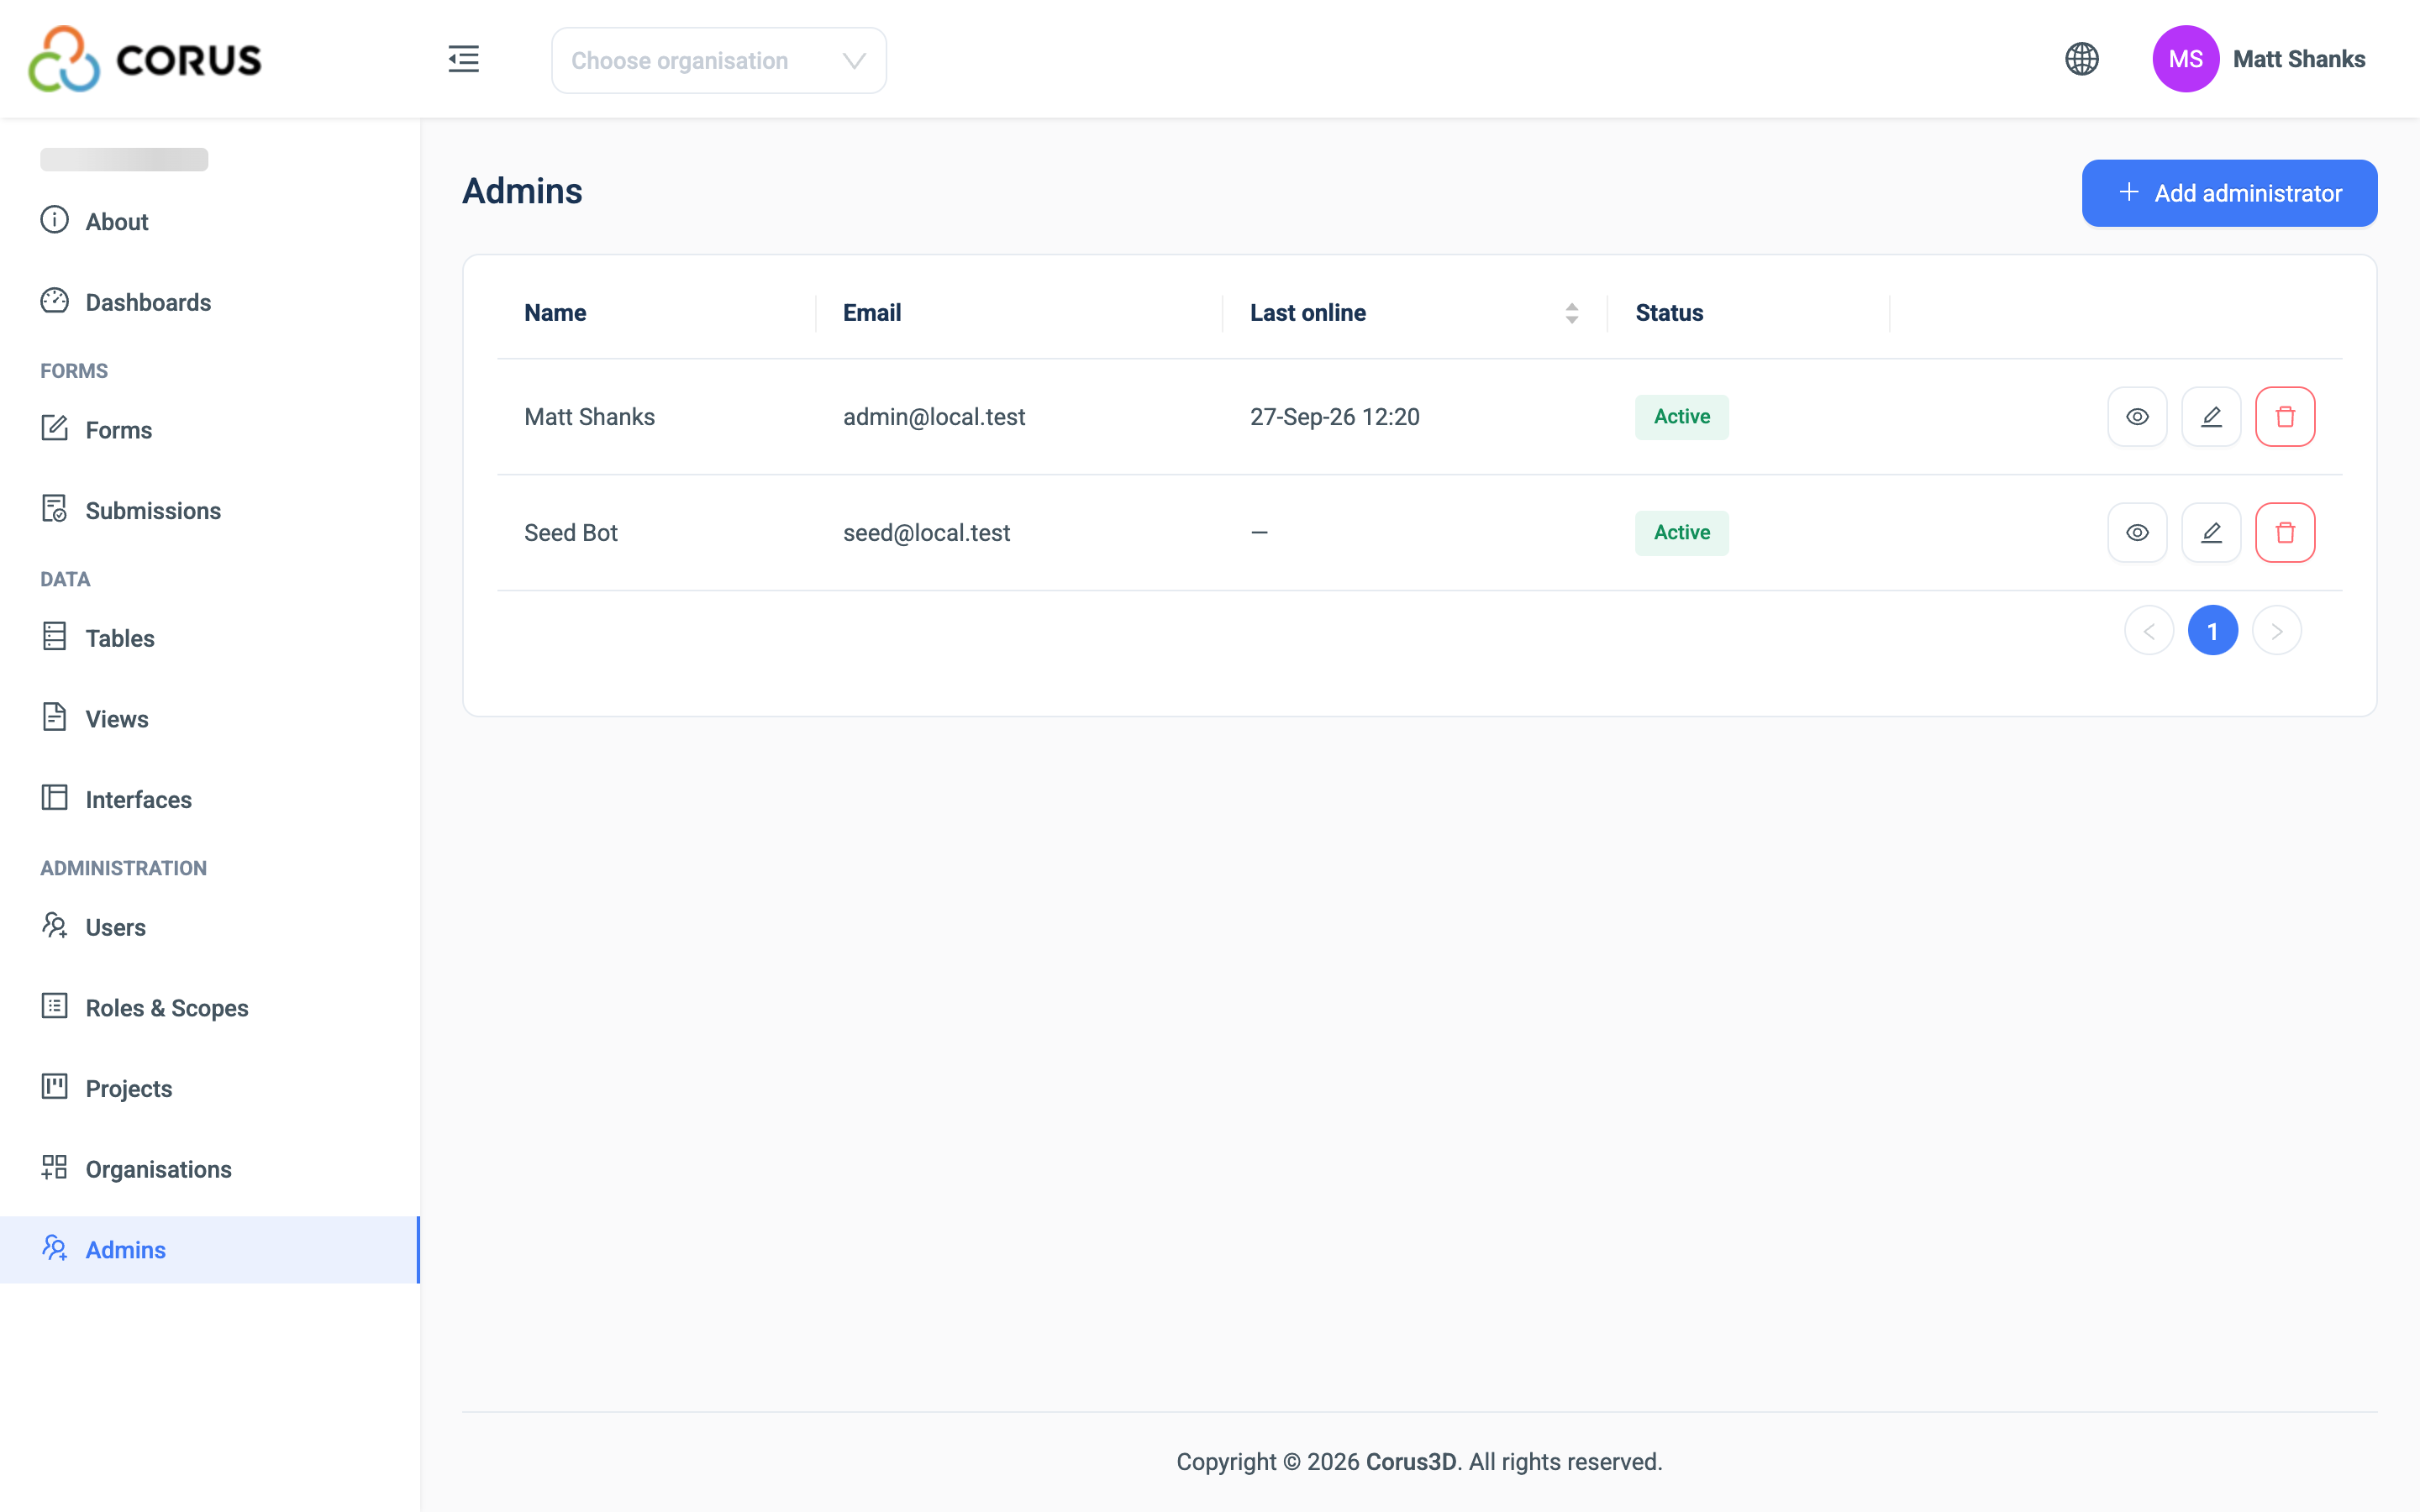
A system administrator has no role in any project and is not listed on the Users page. Their account is managed on the Admins page, which only administrators see.
Adding an administrator
- Open Admins under Administration.
- Click Add administrator.
- Enter the person's Email. For a new account, also enter the first and last name.
- Click Add.
An account that exists is made an administrator. A new email creates the account and sends a link to set the password.
Removing an administrator
Click Remove admin on the administrator's row and confirm. The account is not deleted. It keeps any project roles it had before, and appears in the Users list again. You cannot remove yourself, or the last administrator.